- The User OOBE Broker is a Windows process responsible for the initial setup experience when you first start a new computer, but it can sometimes cause high CPU usage when it keeps running unnecessarily due to Windows updates.
- This process can be mistakenly concerning to users as it consumes a lot of the computer’s power, leading many to think it might be malware. However, it is not a virus, and users can check its legitimacy by confirming its file location in the system.
- Disabling the User OOBE Broker is safe and can solve the high CPU usage problem by changing settings to stop the “Windows Welcome Experience,” using the Registry Editor, or creating a new user profile if necessary.
It usually starts with a sound. You are sitting at your desk, working on a spreadsheet or perhaps in the middle of a gaming session, when suddenly your computer fans spin up to maximum speed. Your system starts to stutter, the mouse cursor lags, and everything feels like it is moving through molasses.
You hit Ctrl + Shift + Esc to open the Task Manager, desperate to find the culprit. Sorting by CPU usage, you expect to see a heavy application like Chrome or a video editor at the top. Instead, you find a process you have likely never heard of: User OOBE Broker (or UserOOBEBroker.exe ).
It sits there, consuming 30%, 50%, or even more of your processor’s power. You try to end it, but it keeps coming back. Naturally, panic sets in. Is this a virus? Is my computer compromised? Why is a “Broker” running on my PC?
If you are dealing with the OOBE Broker draining your resources, you are not alone. This is a common Windows quirk that frustrates thousands of users every year. The good news is that it is not malware, and it is relatively easy to fix once you understand what it is trying to do.
This comprehensive guide will explain exactly what the User OOBE Broker is, why it is misbehaving on your system, and provide you with five step-by-step methods to disable it permanently in 2026.
What Exactly Is User OOBE Broker?
To understand this mysterious process, we first have to decode the acronym OOBE . It stands for “Out of Box Experience.”
In the world of Microsoft and software development, the “Out of Box Experience” refers to the very first interactions a user has with a product. When you buy a brand-new laptop, take it out of the box, and turn it on for the first time, you are greeted by a friendly, full-screen setup wizard. A voice (Cortana) might talk to you, asking you to select your region, connect to Wi-Fi, sign in with a Microsoft Account, and choose your privacy settings.
That entire setup sequence is the OOBE.
The User OOBE Broker ( UserOOBEBroker.exe ) is the background worker process responsible for managing this experience. It pre-loads the slides, handles the transitions between setup screens, and ensures your choices are saved to the registry.
Why Is It Running on a PC That Is Already Set Up?
This is the million-dollar question. If you bought your PC three years ago and set it up back then, why is the “Out of Box” broker running today?
The answer lies in how Microsoft handles Windows updates. In Windows 10 and Windows 11, Microsoft introduced a feature called the “Welcome Experience.”
You have likely seen this before: you restart your computer after a major update, and instead of going to your desktop, you see a full-screen message saying, “Let’s finish setting up your device” or “Get even more out of Windows.” It then prompts you to set up Windows Hello, link your phone, or buy a subscription to Microsoft 365.
To Windows, this post-update screen is technically a “mini-OOBE.” Therefore, the operating system launches the User OOBE Broker process to prepare and display these screens.
The Problem:
Sometimes, this process glitches. It gets stuck in a loop trying to launch the Welcome screen but failing, or it doesn’t close properly after you have clicked “Skip.” The result is a “zombie” process that runs endlessly in the background, eating up CPU cycles and memory as it futilely tries to complete a task that is already finished.
Is User OOBE Broker a Virus?
Before you start disabling things, it is crucial to verify that the file running on your PC is the legitimate Windows component and not a malicious imposter.
While UserOOBEBroker.exe is a standard Windows file; malware creators often name their viruses after legitimate processes to hide in plain sight.
How to Verify the File:
- Open Task Manager ( Ctrl + Shift + Esc ).
- Locate User OOBE Broker in the list.
- Right-click on the process and select Open file location .
The Verdict:
- Safe: If the folder that opens is C:\Windows\System32 , the file is legitimate. You can proceed with the fixes below safely.
- Unsafe: If the folder opens to your Downloads, AppData, or a random folder in C:\Temp , you are likely dealing with malware disguised as the OOBE Broker. In this case, run a full scan with your antivirus software immediately.
Is It Safe to Disable It?
Yes, absolutely.
Disabling the User OOBE Broker will not harm your computer. It is not a critical system kernel process (like ntoskrnl.exe ) or a driver. It is strictly a user-interface helper for setup screens.
By disabling it, you are simply telling Windows, “I don’t need help setting up my device anymore; please stop showing me the Welcome Wizard.” Your apps, games, and internet connection will continue to work perfectly fine.
How to Disable User OOBE Broker (5 Methods)
We have ranked these methods from easiest to most advanced. Start with Method 1, as it solves the problem for 90% of users.
Method 1: Turn Off “Windows Welcome Experience” (The Gold Standard)
The most effective fix is to simply ask Windows nicely to stop running the process. You do this by disabling the specific notification settings that trigger the OOBE Broker.
For Windows 11 Users:
- Open the Settings menu by pressing the Windows Key + I .
- In the left sidebar, click on System .
- Click on Notifications .
- Scroll down to the bottom of the list. You will see a dropdown arrow labeled Additional settings . Click it to expand.
- Uncheck the box that says: “Show the Windows welcome experience after updates and when signed in to show what’s new and suggested.”
- Uncheck the box that says: “Suggest ways to get the most out of Windows and finish setting up this device.”
- Restart your computer.
For Windows 10 Users:
- Open Settings > System .
- Click on Notifications & actions in the left pane.
- Uncheck the box that says: “Show me the Windows welcome experience after updates and occasionally when I sign in to highlight what’s new and suggested.”
- Uncheck the box that says: “Suggest ways I can finish setting up my device to get the most out of Windows.”
- Restart your computer.
By unchecking these boxes, you remove the trigger. Windows will no longer attempt to load the Welcome Screen, so it has no reason to launch the OOBE Broker process.
Method 2: The Registry Edit (For Stubborn Cases)
If the Settings method didn’t work, or if the options were grayed out (common on Enterprise editions of Windows), you can force the change using the Registry Editor.
Warning: The Registry is the nervous system of Windows. Follow these steps exactly. Do not delete keys randomly.
- Press Windows Key + R to open the Run dialog.
- Type regedit and press Enter. Click Yes if prompted by User Account Control.
- Navigate through the folders on the left to reach this path: HKEY_CURRENT_USER\Software\Microsoft\Windows\CurrentVersion\ContentDeliveryManager
- On the right side, look for these specific entries: SubscribedContent-310093Enabled SubscribedContent-338387Enabled SubscribedContent-338388Enabled SubscribedContent-338389Enabled
- Double-click on each of them and change the Value data to 0 . (Note: Setting the value to 0 means “Disabled.”)
- If you don’t see these keys, you can skip them, but usually, SubscribedContent-310093Enabled is the main culprit for the Welcome Experience.
- Close the Registry Editor and reboot your PC.
Method 3: Disable via Task Manager (The Temporary Band-Aid)
If you are in the middle of a meeting or a game and just need the lag to stop right now , you can kill the process manually. Be aware that this is not a permanent fix; the process will likely return the next time you restart or update Windows.
- Press Ctrl + Shift + Esc to open Task Manager.
- Go to the Details tab. (In Windows 11, this is the icon that looks like lines in a list on the sidebar).
- Scroll down until you find UserOOBEBroker.exe .
- Right-click on it and select End Task .
- A warning will pop up asking if you are sure. Click End Process .
This should immediately drop your CPU usage back to normal levels.
Method 4: Create a New User Profile (The Nuclear Option)
If the OOBE Broker persists despite disabling the settings and editing the registry, your current user profile might be corrupted.
Sometimes, the file that tracks whether you have completed the setup gets damaged. Windows looks at the file, sees “Setup Incomplete,” runs the Broker, fails to read the file, crashes, and tries again instantly—creating an infinite loop.
Testing a new profile confirms this:
- Go to Settings > Accounts > Other users .
- Click Add account .
- Select “I don’t have this person’s sign-in information.”
- Select “Add a user without a Microsoft account.”
- Give the account a name like “Test” and click Next.
- Sign out of your current account and sign in to “Test.”
The Test: Use the “Test” account for 10-15 minutes. Open Task Manager. If UserOOBEBroker.exe is not consuming high CPU on this new account, your original profile is corrupted. You may need to move your files (Documents, Pictures, Desktop) to the new account and delete the old one.
Method 5: Check Background App Permissions (Windows 10 Only)
In older versions of Windows 10, the OOBE Broker was categorized as a background app. You could sometimes disable it via the Privacy settings. Note that Windows 11 has largely removed this specific global toggle, but it is worth checking if you are on Windows 10.
- Go to Settings > Privacy .
- Scroll down on the left to Background apps .
- Look for any app related to “Settings,” “Windows Welcome,” or “Microsoft Content.”
- Toggle them Off .
Conclusion
The User OOBE Broker is a classic example of a helpful feature gone wrong. What was designed to be a friendly “Welcome Back” screen often turns into a resource-hogging nuisance.
Fortunately, you don’t have to live with a slow PC. By recognizing that the OOBE Broker is safe to disable and following the steps to turn off the “Windows Welcome Experience” in your settings, you can silence this process for good.
In 2026, keeping your PC optimized is about managing these background distractions. Take five minutes today to adjust your notification settings, and you will likely save yourself hours of fan noise and frustration in the future.
Download Windows 10 Full Free (ISO 32-64 Bit) 2023: Install Windows 10
How to Fix Windows 10 Update Stuck and Failed
How to Get a Printer Online on Windows 10 (Offline to Online)
Fix “Failed To Enumerate Objects In The Container” Windows 10/11
How to Fix Error 740 While Adding Printer on Windows 10/11
Windows 11 Not Showing Up In My Windows 10 Update Settings
Fix Windows 11 Multi Monitor Taskbar Not Working Properly
How To Reset Lost Windows 10 Password Without Logging In
Printer Offline error is a common issue while printing remotely, causing the printer to not print and display an offline message.
To get the printer back online on Windows 10, check network connectivity, run a printer power cycle, clear the print queue, restart the print spooler, remove and reinstall the printer, or restart the PC.
Changing the printer from offline to online involves accessing settings, navigating to Printers and Scanners, and unchecking the “Offline” option in the Printer menu.
When using a printer, you will come across several errors. One of the most frequently occurring errors while printing documents remotely is the Printer Offline error. In this error, your printer will not print any document and a ‘ Printer offline ‘ message will be displayed on your screen.

To resume printing documents remotely, you need to get your printer back online. Thus, here we are with some of the best methods which you can use to turn your printer online.
How to Get Printer Online on Windows PC?
Method 1: Check Network Connectivity.
Before we start with any of the technical methods, let us make some basic checks. A stable network connection is a must for a printer to remain online.
1. Connect your Printer to the internet.
Use an Ethernet wire to connect your printer to your Printer. Also, make sure that your internet connection is up and running.
2. Connect your PC and your Printer to the same network.
If you have a wireless printer, make sure that your PC and Printer are connected to the same WiFi network. If they are connected to different networks, your PC will not be able to communicate with your printer.
Method 2: Run a Printer Power Cycle.
It has been observed that Power Cycling a Printer turns it online. Follow the steps listed below to run a Printer Power Cycle.

Step 1- Turn off your printer and unplug it.
Step 2- Wait for 30 seconds before plugging it back into the power socket.
Step 3- Now, turn on your Printer.
Once your Printer is turned on, check if it is back online. If not, go ahead with the next method.
Method 3: Clear the Print Queue.
If there are a lot of corrupt print requests in the Print Queue of your PC, you might face this error on your PC. Follow the steps listed below to clear the print queue.
Step 1- Launch ‘ Control Panel ‘ on your Windows PC.
Step 2- Here, search for the ‘ Devices and Printers option and click on it.
Step 3- In the Devices and Printers window, right-click on the printer whose queue you wish to clear and select ‘ See what’s printing from the drop-down box.
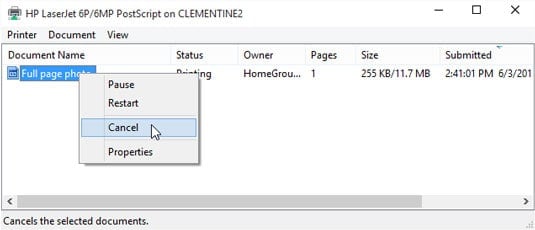
Step 4- You will get a list of all the print requests in a queue. Right-click on each and every print request and select ‘ Cancel ‘ from the drop-down box.
Also, uncheck the checkbox for ‘ Use Printer Offline ‘ if it is checked on this window. Then, check if your printer turns online.
Method 4: Restart Print Spooler.
Step 1- Launch ‘ Run ‘ on your Windows PC by simultaneously pressing the Windows and R keys on your keyboard.
Step 2- Type ‘ services.msc ‘ in the text box and hit Enter .
Step 3- A list containing all the services on your Windows PC will appear on your screen. Search for ‘ Print Spooler ‘ and right-click on it.
Step 4- Now, select ‘ Restart ‘ from the drop-down box.
Check if your printer turns online. If not, go ahead with the next method.
Method 5: Remove and Reinstall your Printer.
Step 1- Launch ‘ Control Panel ‘ on your Windows PC.
Step 2- Here, search for the ‘ Devices and Printers option and click on it.
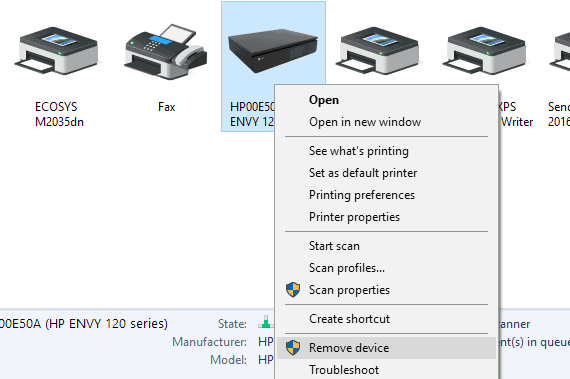
Step 3- In the Devices and Printers window, right-click on the printer which is offline and select the ‘ Remove Device ‘ option from the drop-down box.
Step 4- Now, click on the ‘ Add a printer or scanner option in the same window to reinstall your Printer.
Now, check if your Printer is back online. If not, go ahead with the next method.
Method 6: Restart your PC.
If none of the above-listed methods help you in turning your printer online, try restarting your PC. Check if your printer is back online after restarting your PC.
How to Change Printer from Offline to Online
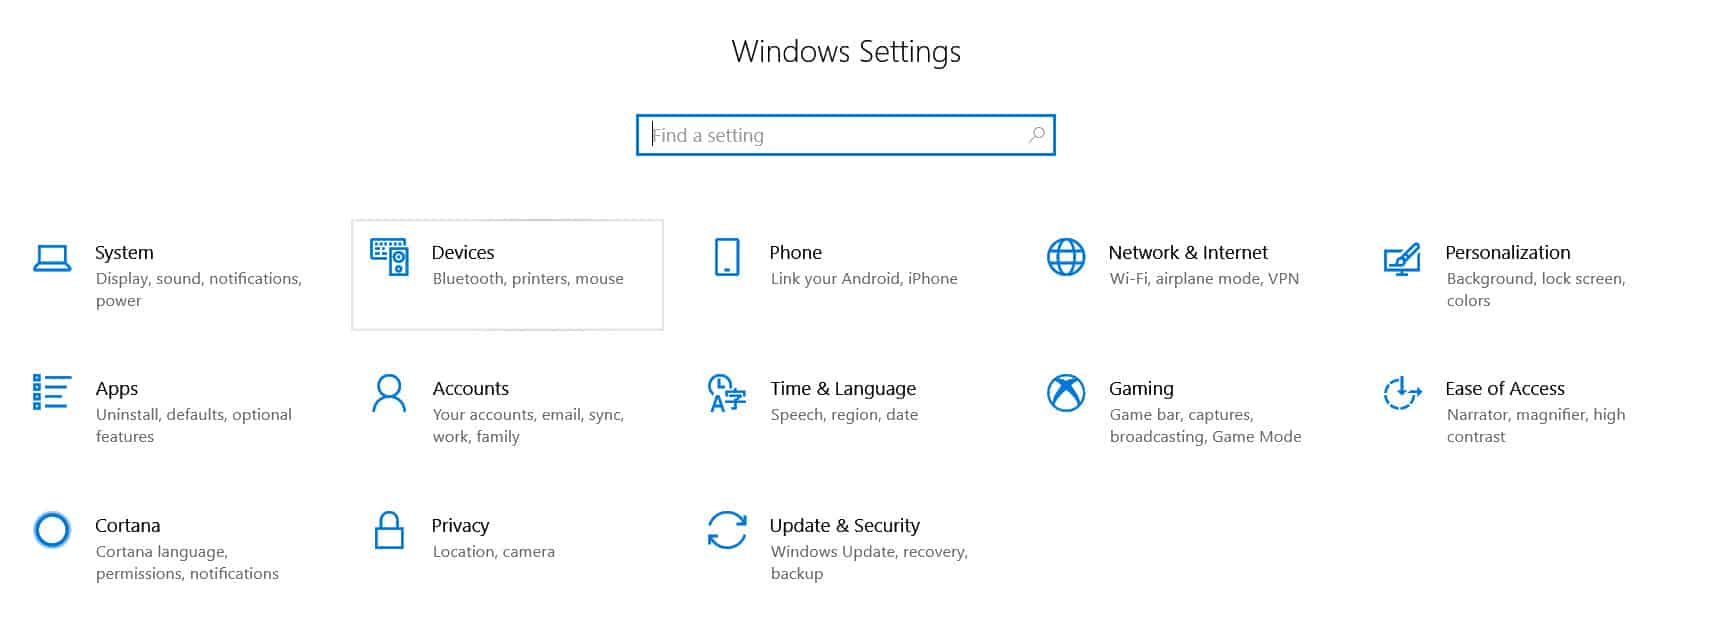
Step 1: Open “Settings” and go to “Devices: Printers, Bluetooth, etc”
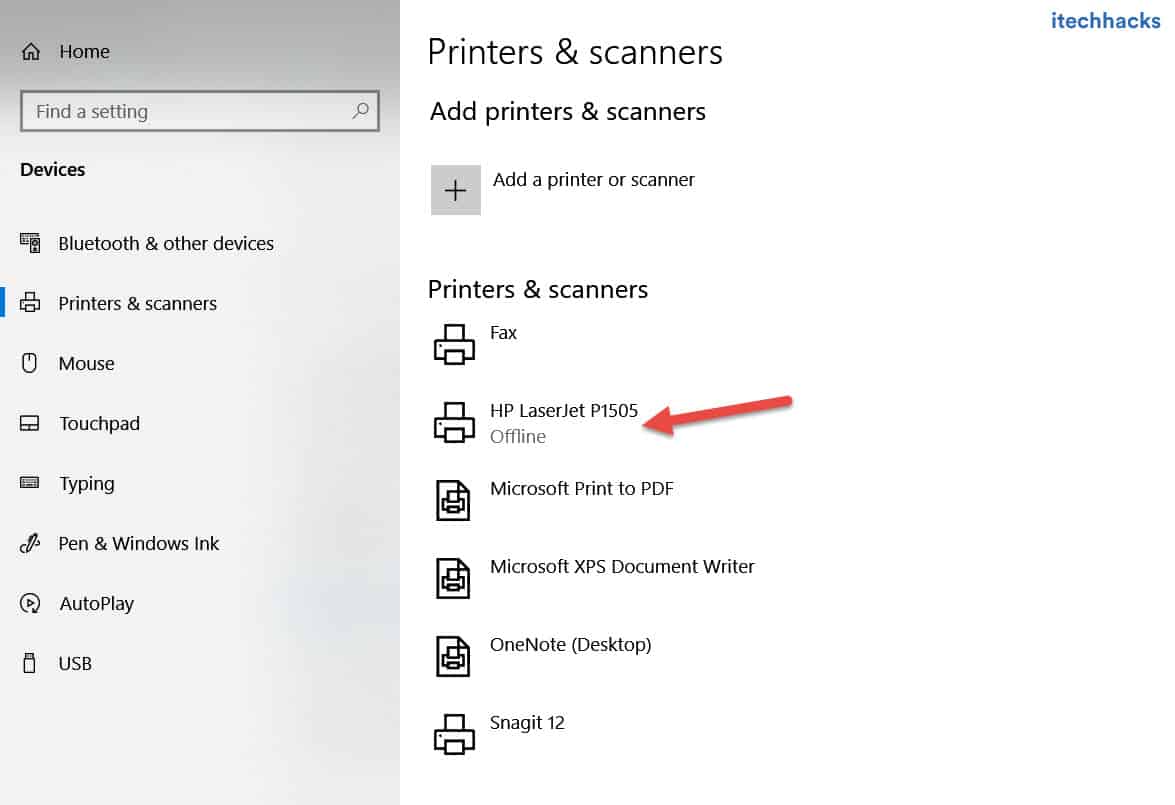
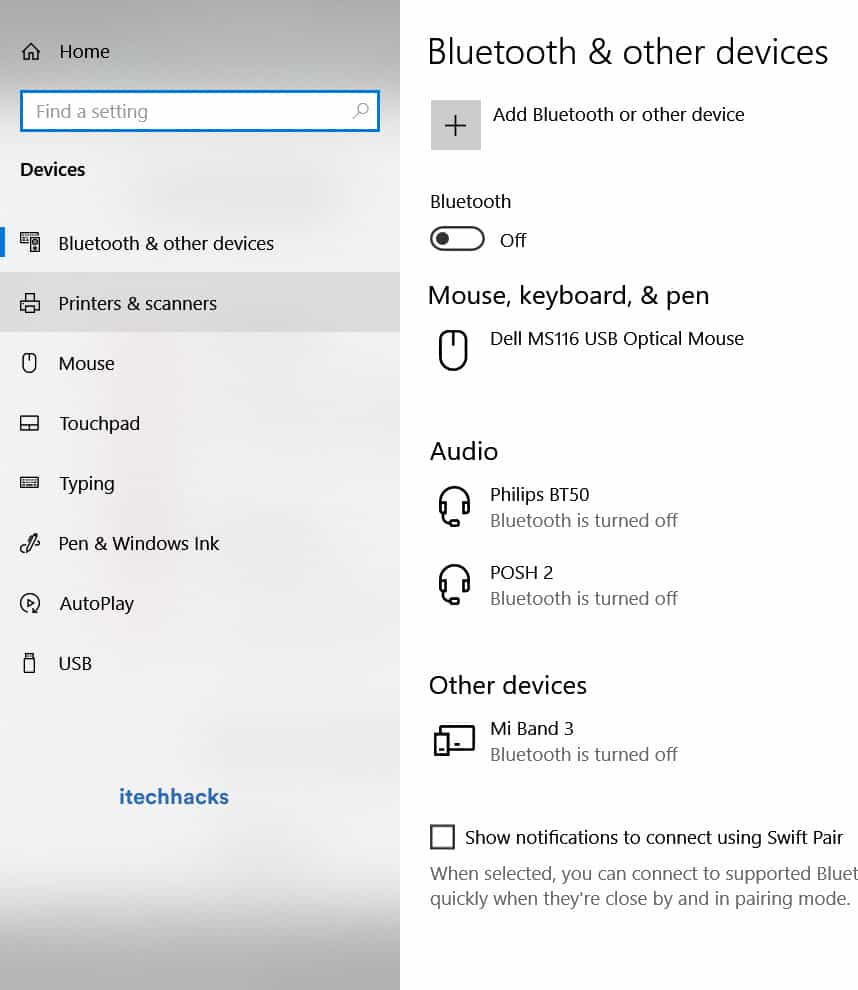
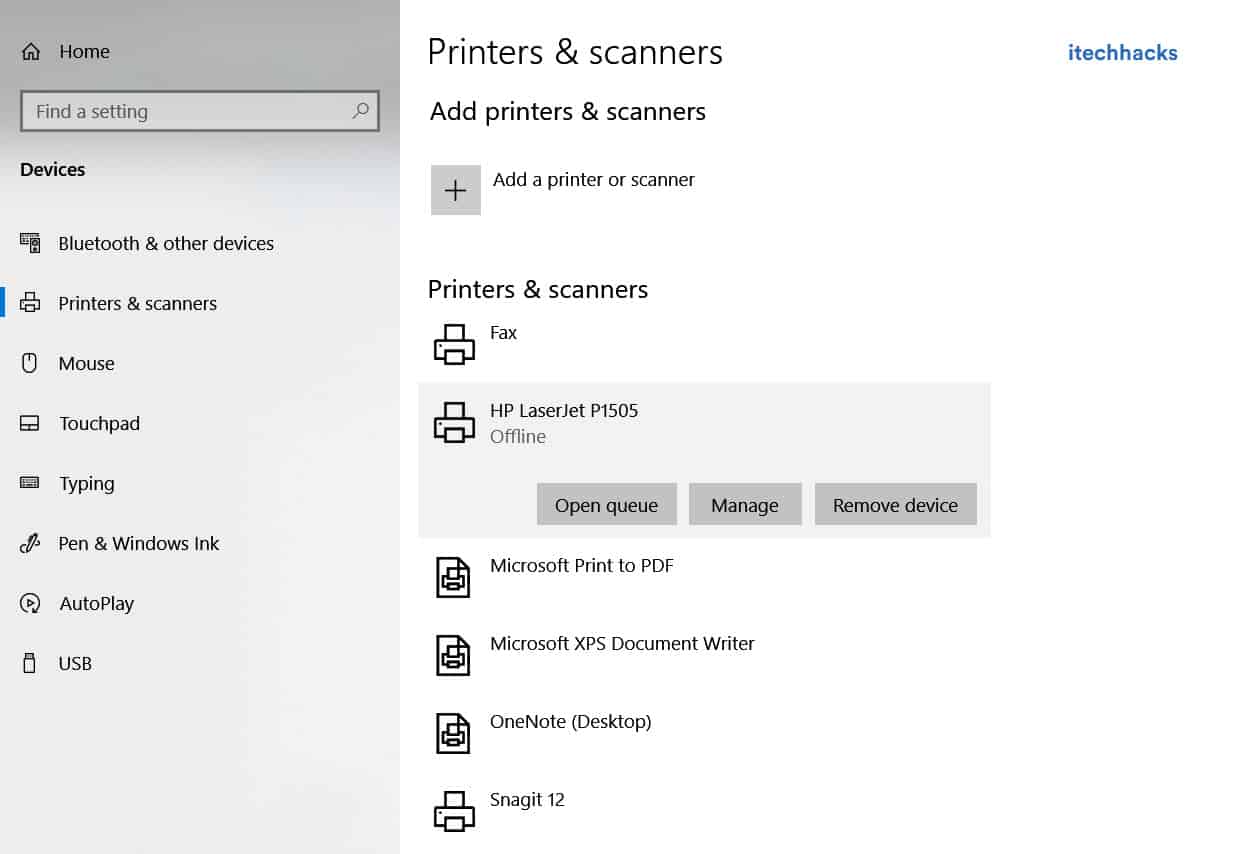
Step 2: Click on “Printers and Scanners”
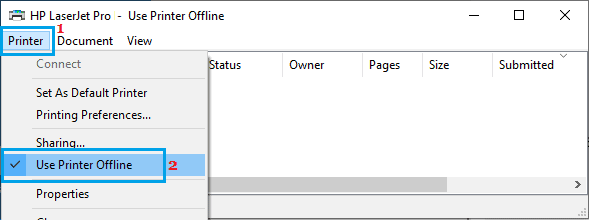
Step 3: Now, Click on “Printer Offline” and the Printer menu will appear.
Step 4: Click on “Printer” in the menu bar and uncheck “Offline.”
<img loading=“lazy” src=“https://itechhacks.com/wp-content/uploads/2021/03/printer-offline-online.jpg" onerror=“this.onerror=null;this.src=‘https://blogger.googleusercontent.com/img/a/AVvXsEhe7F7TRXHtjiKvHb5vS7DmnxvpHiDyoYyYvm1nHB3Qp2_w3BnM6A2eq4v7FYxCC9bfZt3a9vIMtAYEKUiaDQbHMg-ViyGmRIj39MLp0bGFfgfYw1Dc9q_H-T0wiTm3l0Uq42dETrN9eC8aGJ9_IORZsxST1AcLR7np1koOfcc7tnHa4S8Mwz_xD9d0=s16000';" alt=“Click on “Printer: Offline” and the Printer menu will appear. Click on “Printer” in the menu bar and uncheck “Use Printer Offline.” This action will change the printer from offline to online. - 19”>
<img loading=“lazy” src=“https://itechhacks.com/wp-content/uploads/2021/03/printer-offline-online.jpg" onerror=“this.onerror=null;this.src=‘https://blogger.googleusercontent.com/img/a/AVvXsEhe7F7TRXHtjiKvHb5vS7DmnxvpHiDyoYyYvm1nHB3Qp2_w3BnM6A2eq4v7FYxCC9bfZt3a9vIMtAYEKUiaDQbHMg-ViyGmRIj39MLp0bGFfgfYw1Dc9q_H-T0wiTm3l0Uq42dETrN9eC8aGJ9_IORZsxST1AcLR7np1koOfcc7tnHa4S8Mwz_xD9d0=s16000';" alt=“Click on “Printer: Offline” and the Printer menu will appear. Click on “Printer” in the menu bar and uncheck “Use Printer Offline.” This action will change the printer from offline to online. - 20”>
Conclusion:
These are some of the most effective methods which you can use to make your Printer online on Windows 10 and MacOS. The steps involved in these methods are easy to execute.
- Windows Users encountering Error 740 while trying to add printers on Windows 10/11
- Users facing issues related to network privileges, administrative authorities, and printer drivers
- Solutions include checking printer connectivity, cables, disabling User Account Control, running Printer Troubleshooter, updating drivers, and checking for Windows updates.
The Windows Users are frustrated with a new issue that is not letting them add the printer on Windows 11 or 10. Whenever they try to add the printer on Windows 10 or 11, they get Error 740. Even after a lot of new updates, Windows 11 is still not free from bugs and issues. The users are complaining about various issues in the Windows Community, which shows that many users are stuck with different issues on Windows.
The users who have the printer have reported getting Error 740 and will add the printer to the Printer Wizard Menu. They cannot determine why this error comes to them when they add the printer on Windows 10 or 11. Some users who have Windows 10 have also reported the issue. We are here with a guide on How To Fix the Error 740 Adding Printer issue. We will also explain the reasons why you are getting this issue. So, let’s start with the guide to learn how to resolve the issue.

What is Error 740 on Windows 11 Add Printer?
The users who are trying to add the printer on their Windows 11 have reported that they are getting Error 740 Adding Printer . If you are also getting the same issue, you might have seen the message elaborating on the network privileges or administrative authorities. There are chances that the issue might be occurring due to various reasons. We will list the common reasons for the cause of the issue below. You can check them, as it will help you resolve the issue without hassle.
- The printer is not connected properly.
- There are some network driver issues with Windows 11.
- The printer driver is not installed on the device properly.
- The printer wizard is not getting administrative privileges.
- There are some problems with the printer.
Fix Error 740 While Adding Printer on Windows 10/11
Many of you are frustrated with the Error 740 Adding Printer issue. The issue is not very complex to resolve. You can easily resolve it with the help of the methods we will list below. You must ensure you implement them on your system without any issues.
Check the Connectivity of the Printer
The users must ensure that the printer they try to add is appropriately connected to their system. If you don’t know, sometimes the cables provided by the printer are loose, so it cannot make proper connections with the system. Also, if you are using any cable that is physically damaged or there are some issues with it, then it’s likely that the issue of error 740 adding printer will occur. We suggest you check the printer’s connectivity on your system before starting the printer wizard. You can quickly check it from the Devices and Printers available in the Control Panel.
Check For Cables
We suggest you check the cables that are provided with the printer. You also have to check whether the power cable is working properly. Sometimes the printer is not getting a properly stabilized power supply due to any fault of the power outlet or cable, and the users get the error 740 adding printer issue. Thus, we will suggest you check the printer cables and ensure they are in working condition. If there is any physical damage to it, then you have to get it repaired.
Disable The User Account Control
You can also disable the User Account Control on your Windows while installing the printer. The User Account Control manages the apps from making changes, so there are chances that it might be causing conflicts in adding the printer. Thus, we suggest you disable the User Account Control with the steps listed below to check whether the issue has been resolved.
- Press Windows + R Key to Open Run .
- Now, type useraccountcontrolsettings and click Enter .
- After it, drag the slider to Never Notify and press the OK button to save the changes.
- Check whether the issue has been resolved by adding the printer again.
- Once the printer has been added, set the slider to normal settings again.

Run The Windows Printer Troubleshooter
You can also try running the Windows Printer Troubleshooter to evaluate if there are any hardware or software issues with the printer. Windows gives a feature through which users can troubleshoot the printer independently. The steps will be going to be very simple for you. The user only has to run the Windows Printer Troubleshooter; after it, the troubleshooter will start looking for possible issues. If any issues are detected, the troubleshooter will show it on the screen. It will also resolve the issue if it is a software problem. If it is a hardware problem, you must contact the service center. You can follow the steps which are listed below to run the Windows Printer Troubleshooter.
- Press Windows + I Key to open Settings .
- Now, click on Troubleshoot after scrolling down in the System section.
- Select the Other Troubleshoot option .
- After it, click on the Run option just near the Print option .
- Follow the on-screen instructions and wait for the process to get completed.

Check The Printer Drivers
There are chances the printer that you are trying to use might not be working due to the driver’s issue. We expect the printer drivers might not have been installed on your system, so you are getting such issues. We suggest you check the printer drivers by going to the device manager. If you have not updated it for a long time, then update it. However, if it is updated, uninstall the driver and reconnect the printer to install the driver again to ensure there are no software issues. After uninstalling or updating the printer’s driver, restart the system and check again.
Check For Windows Update
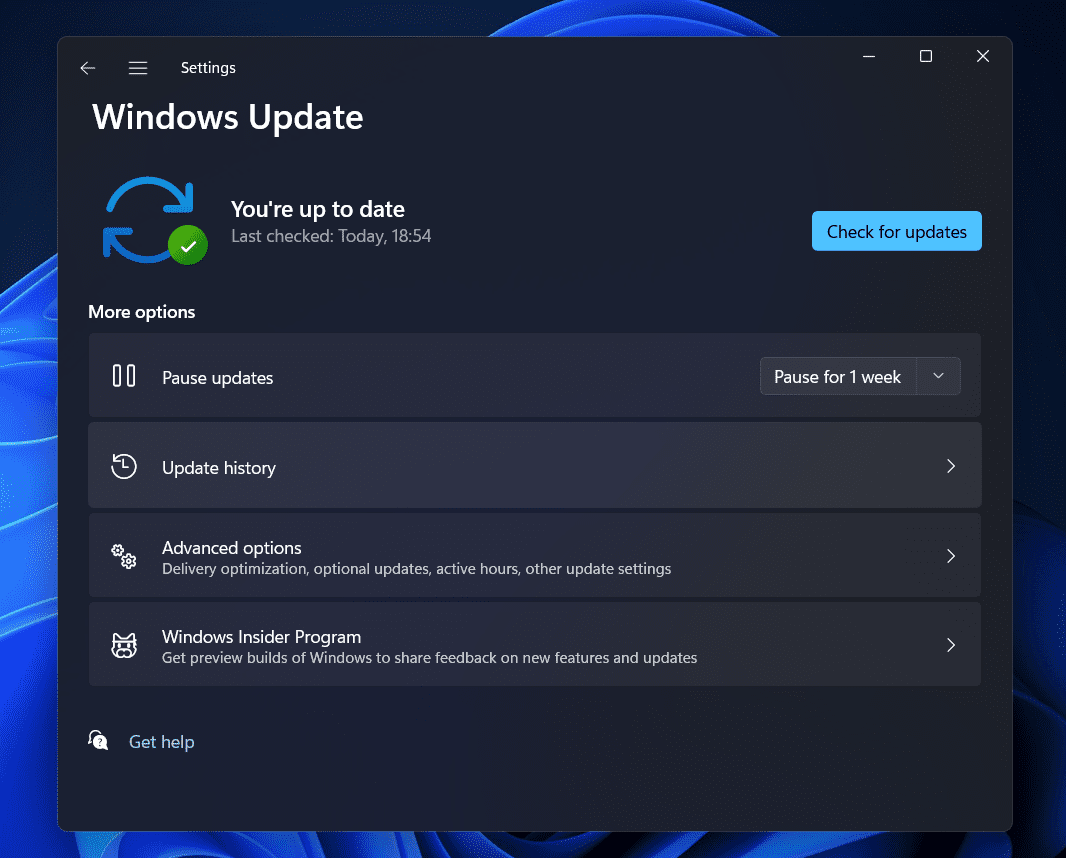
Sometimes, your outdated Windows version can also cause issues in adding a printer. We all know that all the software and hardware rely on Windows to work properly. If you are not using the latest Windows version on your PC, you will likely be facing issues with it. We suggest you check for the Windows update on your system to ensure you are using the latest Windows version. If any updates are available for the system, download and install it. After it, try to connect and add the printer to your system again.
Wrapping Up
Users are frustrated with getting the Error 740 Adding Printer on the Windows. Many users have searched for a guide to fix the issue and add the printer to their Windows without any issues. However, they were not able to do so even after a lot of tries. In this guide, we have listed the methods that will help you resolve your problem.
- How To Add Wireless Printer In Windows 11
- How to Get Online Printer Issue on Mac
- Get Printer Online on Windows 10 (Offline to Online)
- How To Fix Windows 11 Printer Spooler Error
- How To Install Windows 11 Printer Drivers Easily
- How To Delete Printer Driver In Windows 11
- Delete Restore Point In Windows 11
