- Windows 11 users experience random restart problems due to various factors like group policies, overheating, and failing storage sectors.
- To fix random restart issues, users can disable automatic restart, update group policies, disable fast startup, scan for viruses and malware, run an SFC scan, and undo any overclocking.
- Following these troubleshooting steps will help resolve the random restart problem in Windows 11 effectively.
Many users have reported that after upgrading to Windows 11, they are experiencing a variety of issues with the operating system. Users have reported that Windows 11 has been causing them problems with random restarts. Many users are affected by the issue as a result of inconsistencies in group policies, failing storage sectors, overheating, overclocked components, and other factors.
Fix Windows 11 Restarting Randomly
This article will assist you if you are having problems with random restarts in Windows 11. In this article, we’ll look at how to resolve random restart issues in Windows 11 .
Disable Automatic Restart
The very first thing that you should try doing is disable the automatic restart. To disable automatic restart, follow the steps given below-
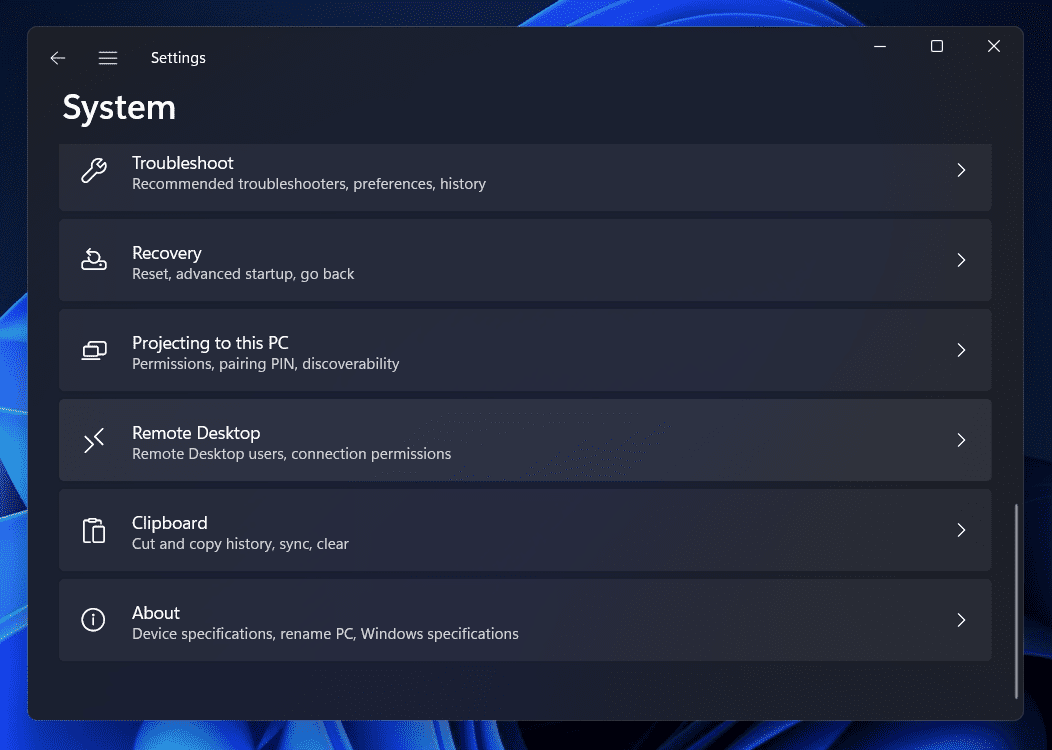
- Press the Windows + I key combo to open the Settings app on your PC.
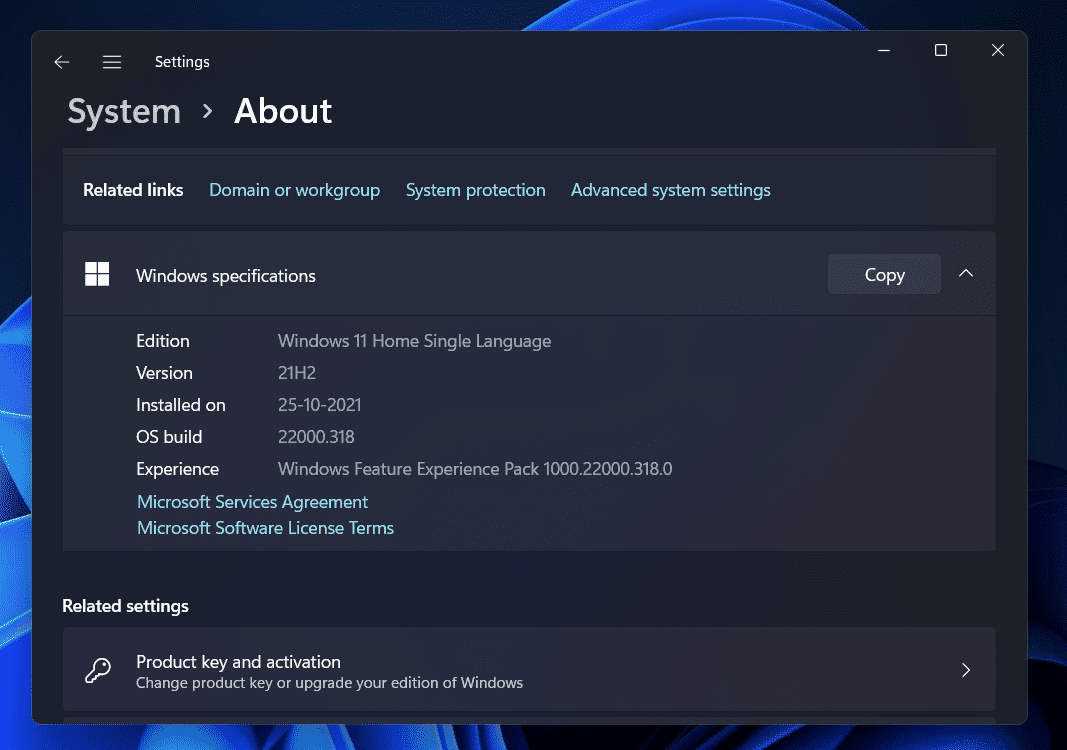
- Head to the About section on the right side in the System tab.
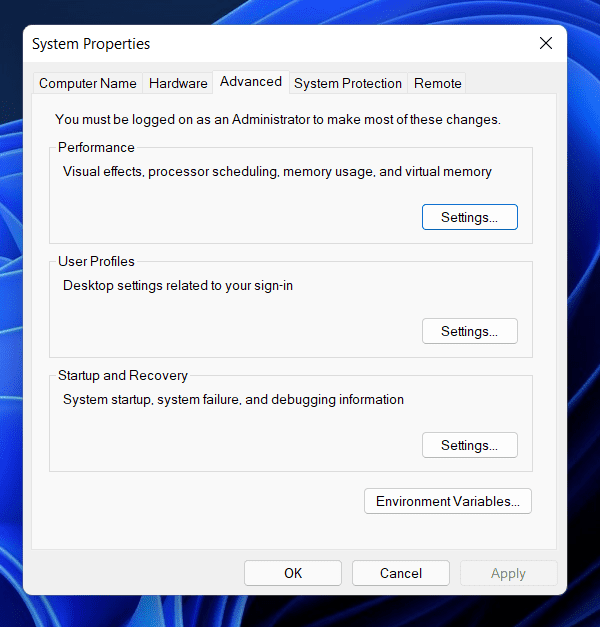
- Now, click on the Advanced System Settings option.
- This will open up the Advanced tab in the System Properties window.
- Click on the Settings button under the Startup and Recovery.
- Now, uncheck the checkbox saying Automatically Restart and then click on OK.
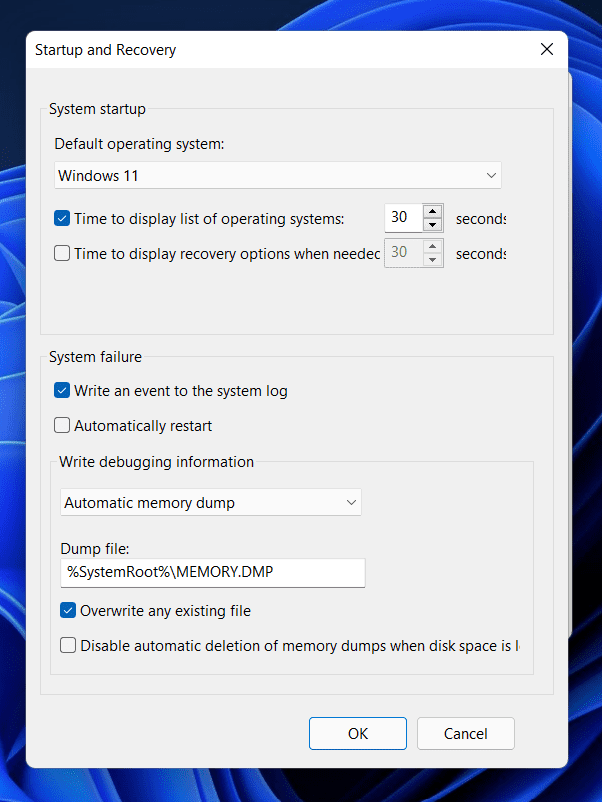
- Once done, restart your PC and then check if the issue persists or not.
Update Group Policies
You may also face the issue due to inconsistent group policies. Therefore, you should prefer updating group policies to fix the issue. To do so, follow the steps given below-
- In the Start Menu, search for CMD. Right-click on the Command Prompt , and then click on the Run as administrator.
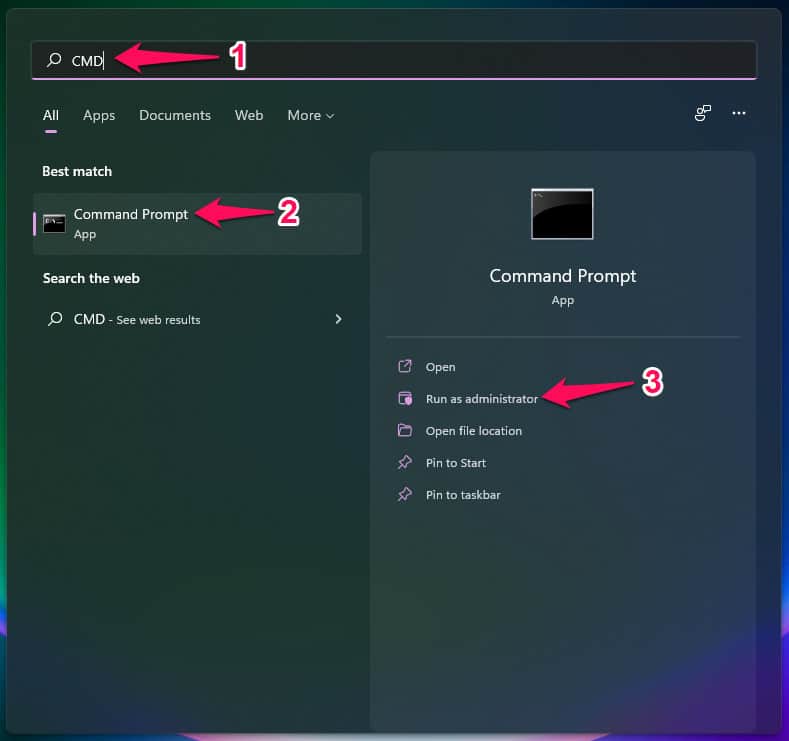
- In the Command Prompt , type the command gpupdate and hit Enter to execute the program. This will update the group policies on your Windows 11.
Disable Fast Startup
The fast startup may also be the reason behind you facing the random restart problems in Windows 11. If you are facing this issue on Windows 11, then you should probably try disabling the fast startup. To do so, follow the steps given below-
- In the Start Menu, search for Control Panel and open it.
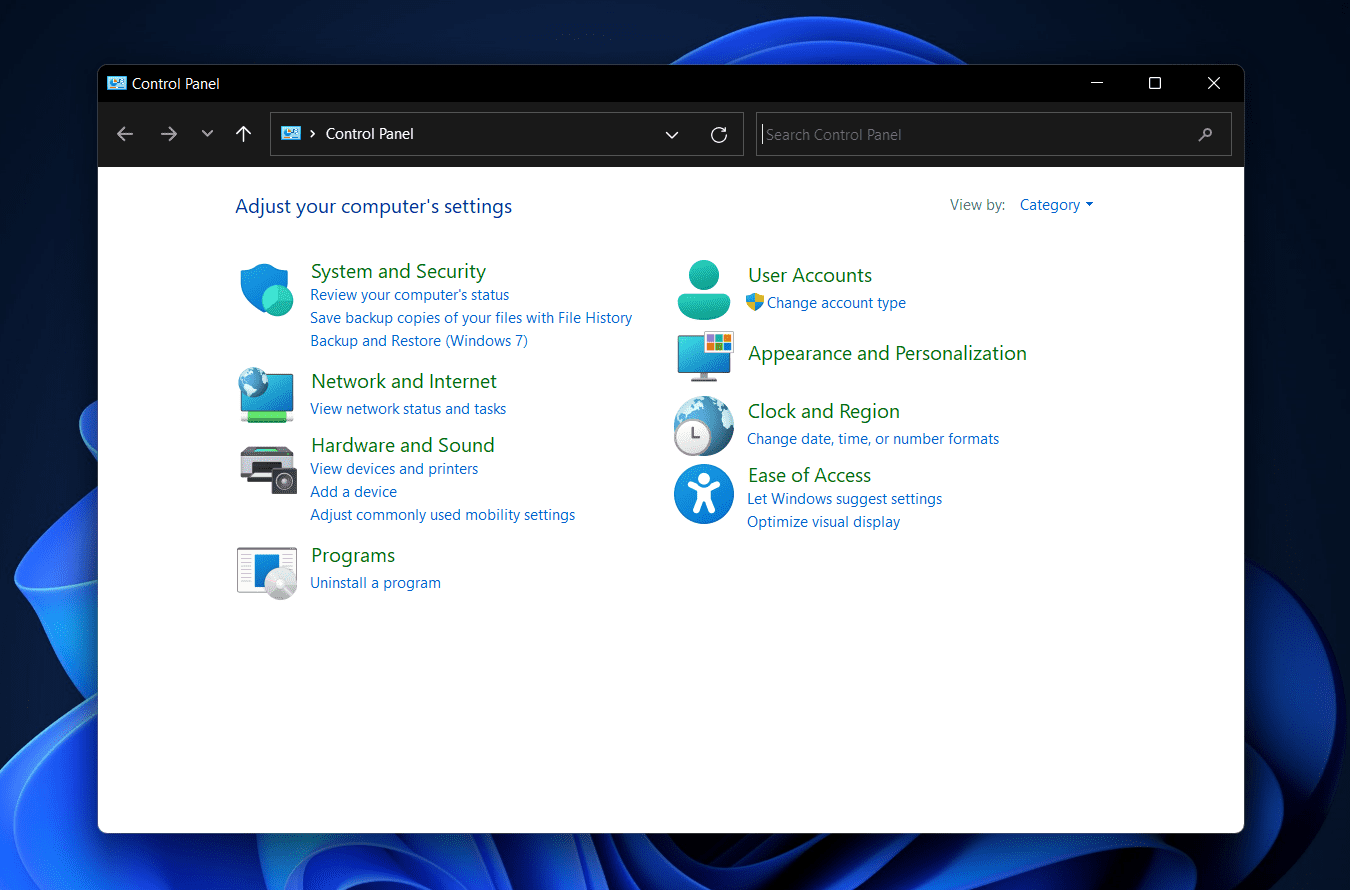
- In the Control Panel , click on the System and Security option.
- On the next screen, click on the Power Options .
- Now on the left sidebar, click on the Choose what the power buttons do.
- On the next screen, click on Change settings that are currently unavailable.
- Next, uncheck the checkbox saying Turn on fast startup and then click on Save Changes.
This should fix the random restart problems in Windows 11. If the error didn’t get solved, then you should move to the next troubleshooting step.
Scan Your PC For Virus And Malware
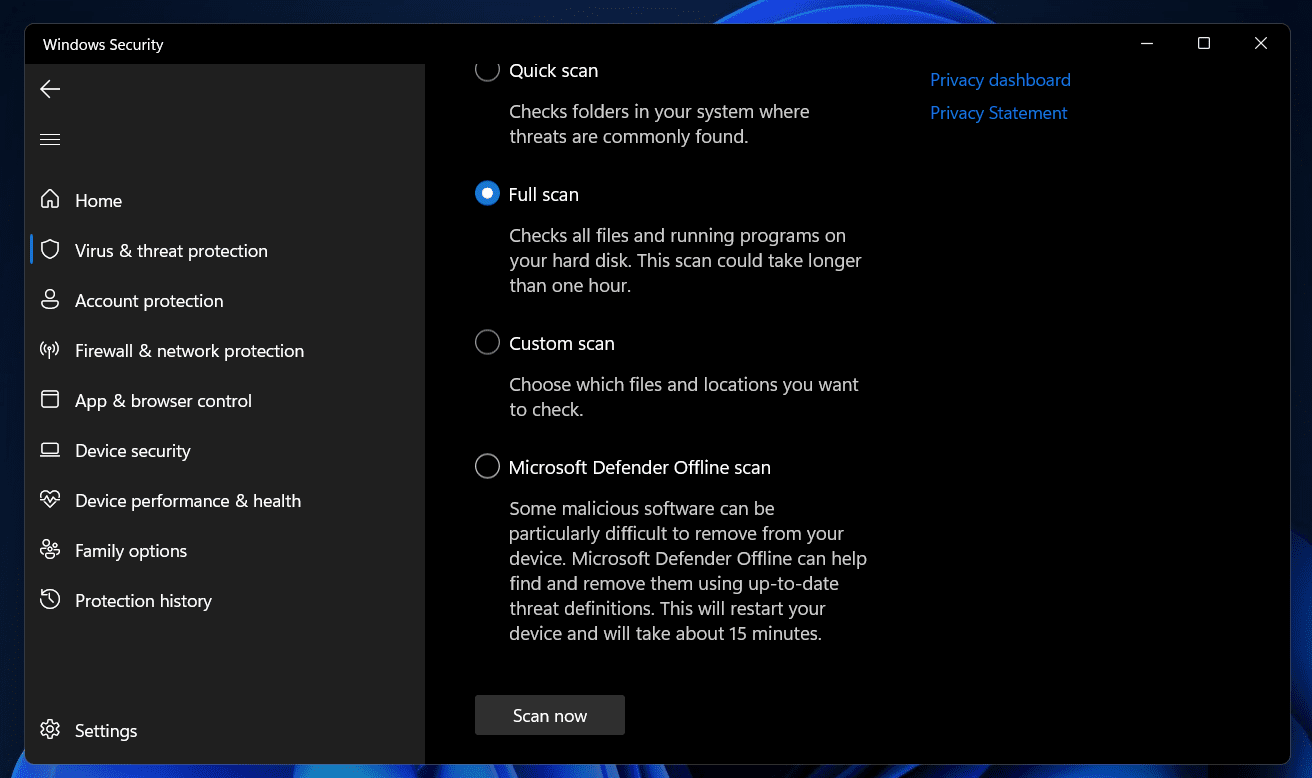
If you have been facing random restart problems in Windows 11, then you should probably try scanning your PC for viruses and malware. Many times the reason behind your PC randomly restarting can be the virus and malware on your PC. You should try scanning your PC for viruses and malware to fix the issue that you are facing. You can use Windows security to scan your PC for viruses and malware. To do so, follow the steps given below-
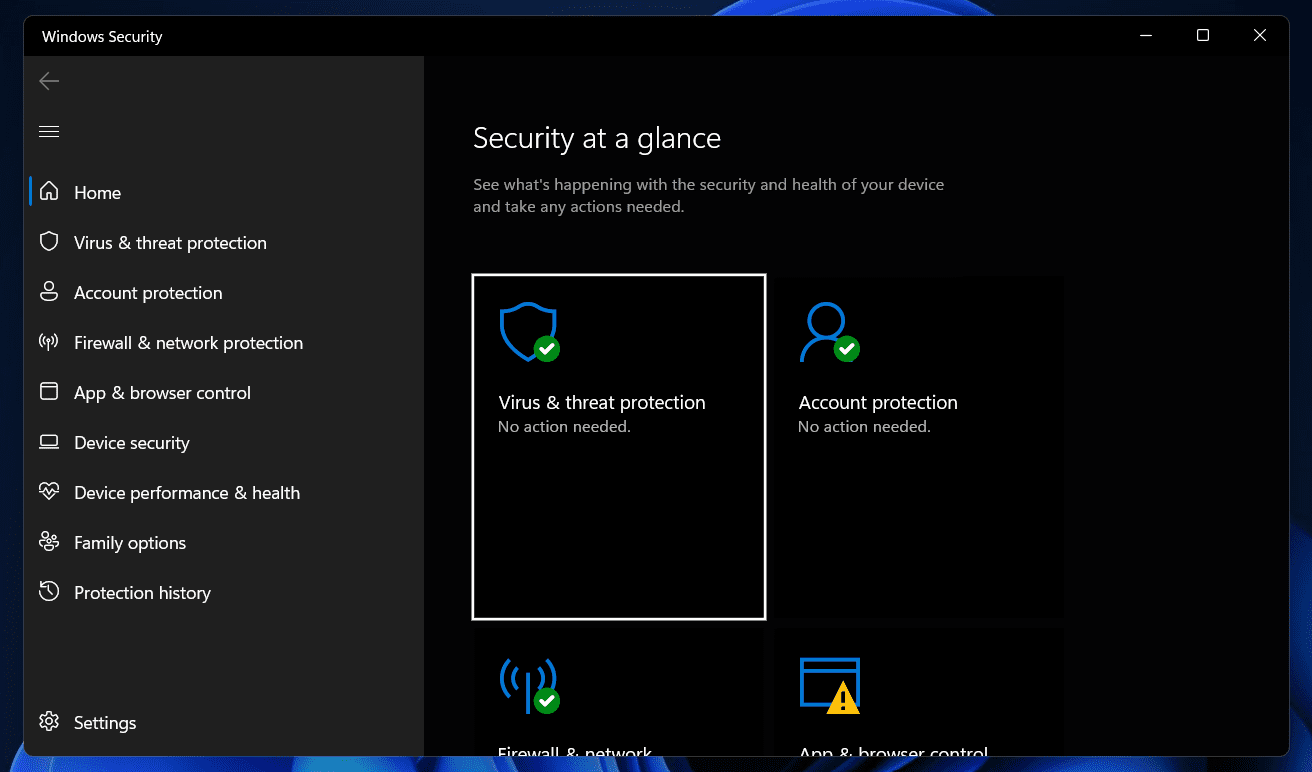
- Open the Windows Security app by searching for it on the Start Menu.
- In the Windows Security app, click on the Virus & threat protection option.
- On the next screen, click on the Scan Options .
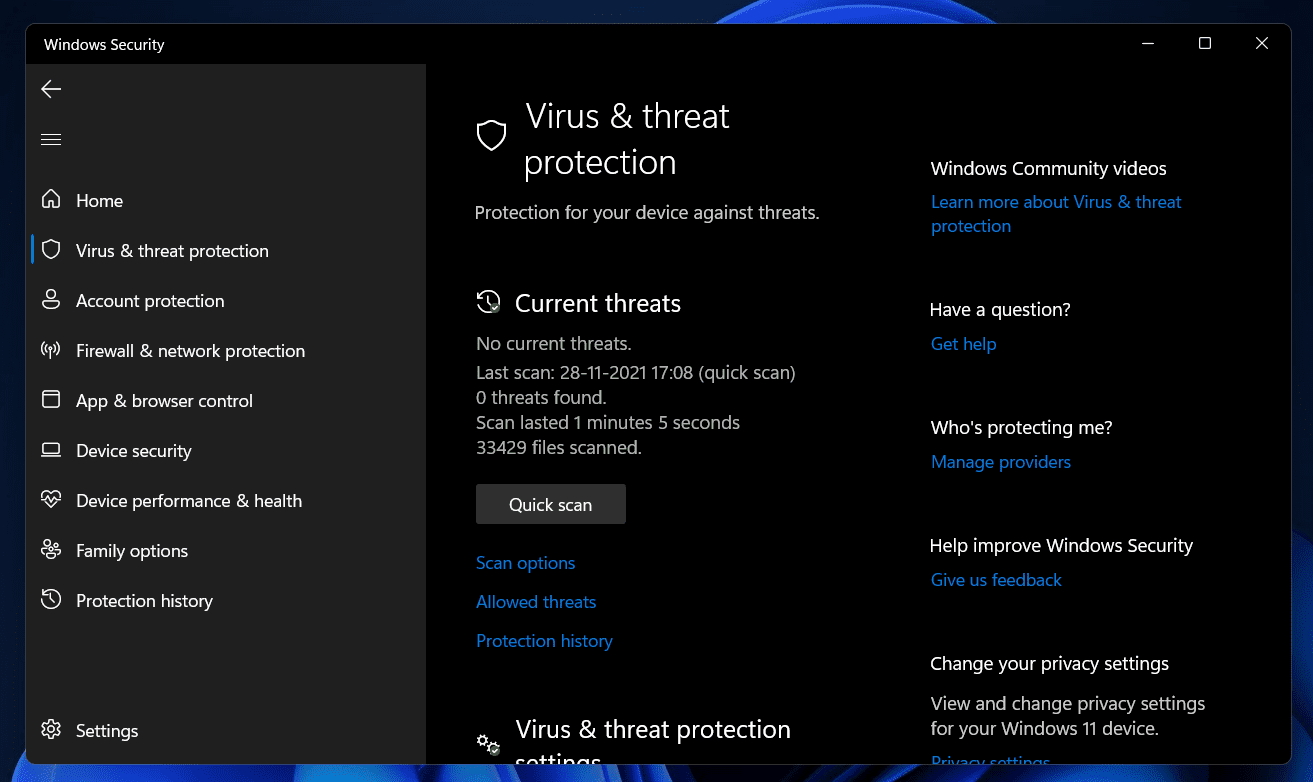
- Next select, Full scan and then click on Scan now button.
You can either use third-party antivirus software to scan your PC for viruses and malware.
Run SFC Scan
You can also perform the SFC scan to fix the issue with the PC. If the issue has been caused due to corrupted files, then you can fix it by performing an SFC scan. To do so, follow the steps given below-
- In the Start Menu , search for Command Prompt . Select it, and then click on Run as administrator.
- In the Command Prompt , type the command sfc /scannow and hit Enter.
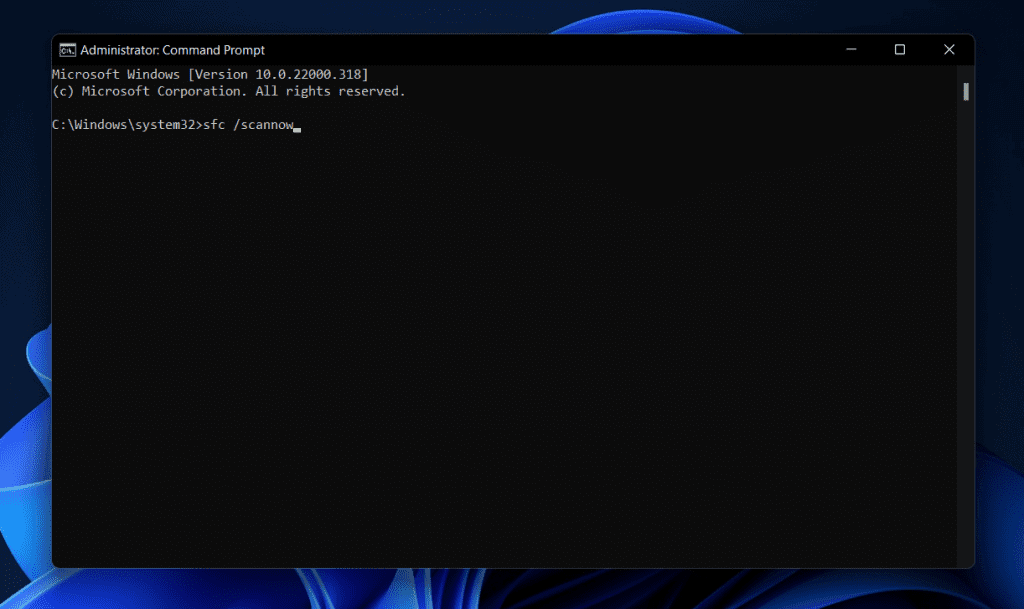
- The process will begin and the tool will start scanning your PC for errors due to corrupted files. Wait for the process to complete, and then close the command prompt.
- Now restart your PC, and you should no longer face the issue.
If this didn’t work, then you can also run the CHKDSK scan.
- To do so, run the command prompt as the administrator by following the steps above and then execute the following command in the command prompt- Chkdsk /x /f /r
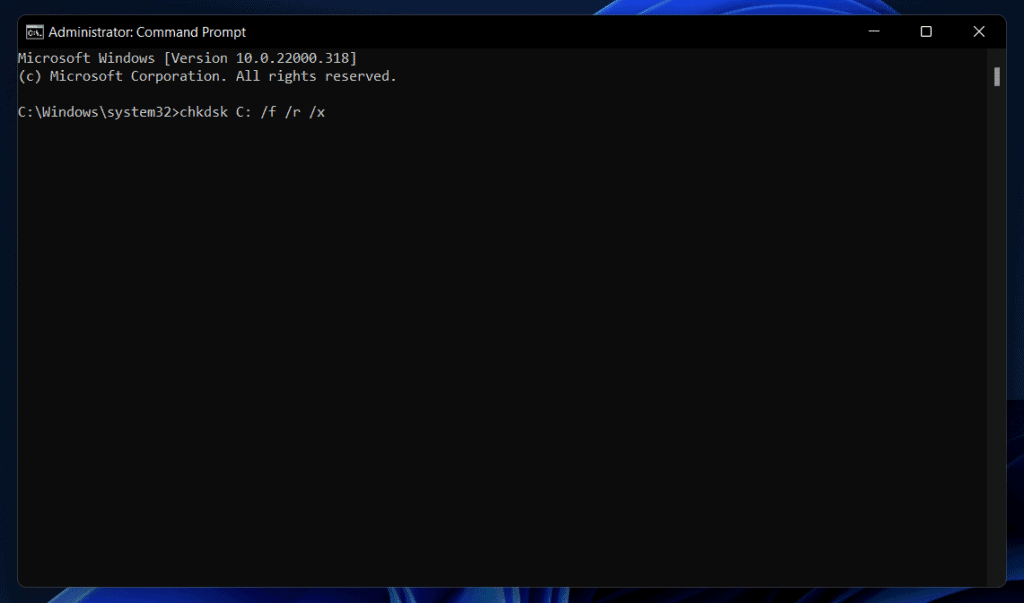
- If you are asked to confirm getting ahead with the process, then press Y and hit Enter to continue.
Undo Overclocking
If you have been facing this issue after overclocking the CPU, then you will have to revert to overclocking the CPU. You should try overclocking or increasing the undervolted components to fix the random restart problems in Windows 11.
RELATED GUIDES:
- How To Install Windows 11 Printer Drivers Easily
- How to Boot Windows 11 in Safe Mode
- Windows 11 Won’t Boot? Ways To to Get PC Boot Again
- Fix Hotkeys (Fn Keys) Not Working On Windows 11 Laptop
These were some steps to fix random restart problems in Windows 11. Following the above steps, you will be able to fix the random restart issue that you face in Windows 11.
- Printer drivers are essential for keeping your printer functional and bug-free.
- Update printer drivers through Windows update by accessing Settings, checking for updates, and installing the driver.
- Other methods include downloading drivers from the official website, using a disk to install drivers, or utilizing third-party driver updater software like Driver Booster.
If you are an office person, student or someone, whose main part of the job is printing, then you will need to have updated your printers drivers. Printer drivers are essential to keep your printer functional and updated with all the latest features. Updating the printer drivers ensures that your printer functions and remains bug-free. There are various ways to update printer drivers, you can do it manually as well as with the help of a third-party driver updater.
How To Install Windows 11 Printer Drivers
In this article, we will be discussing how you can install Windows 11 printer drivers.
Updating Printer Drivers Through Windows Update
The very first way to update printer drivers is through the Windows update. Windows update not only brings the updates for Windows but it also brings all the drivers updates for the hardware installed on your PC. To install Windows 11 printer drivers through Windows update, follow the steps given below-
- Head to the Settings app on your PC. To do so, search for Settings in the Start Menu or press the Windows + I key combo. This is the shortcut key to open the Settings app.
- Now in the Settings, click on the Windows update on the left sidebar.
- On the right side of the Settings, click on Check for updates. You will see all the updates for your PC listed here. You will also see an Option updates section here. Click on it, and this is where you will see the driver update.

- Look for your printer drivers here. Download and install your printer drivers.
- After done, close the Settings app and then restart your PC to make the changes.
Download The Drivers From The Official Website
Another way to do this is by downloading the drivers from the official website of your printer’s manufacturer and then installing it. To do so, follow the steps given below-
- Firstly, visit the official website of your printer. For instance, if you are using the printer from Canon, Epson, HP, or any other website, then head to their official website for the printer.
- Now search for your model of printer, and open it. If you don’t know what is the model of your printer, then you can check for it on the printer box. Generally, the model is mentioned on the body of the printer, so you can check that as well.
- Here, you will see the download section, click on it. You will find the drivers for your printer here.
- Download the driver for your printer.
- Now head to the location where you have saved the file, and run the setup by double-clicking on the file.
- Follow the on-screen instructions to install the drivers for your printer.
Use The Disk To Install Drivers
Whatever printer you are using, will have a disk with all the essential drivers required. You should find it inside the box. To follow this step, you must ensure that your PC has a CD driver, else you won’t be able to install drivers using this method.
- Insert the disk into the disk drive of your PC.
- Now open the file explorer on your PC by pressing the Windows + E key combo. You can either search for File Explorer in the Start Menu and open it.
- Double-click on the Disk Drive icon on the File Explorer to run the setup.
- Follow the on-screen instructions to run the setup, and install the printer drivers on Windows 11.
Using Third-Party Driver Updater
Another way to do this is by using third-party driver updater software. There are various third-party driver updater software like Driver Booster or Driver Pack Solution. You can use either of this software to update or install Windows 11 printer drivers.
Download either the Driver Booster or the Driver Pack Solution from their official website. Download and install any of these apps on your PC. When you run the app, you will see the option to scan your PC for outdated or missing drivers. Click on this button. You will have to connect your PC to a stable internet connection.

After the software scans your PC for all the drivers required to be installed or updated, you will see a list of drivers. Select the printer driver, download it and install it. You will be asked to restart your PC. Restart to make the changes, and you will have successfully installed Windows 11 printer drivers.
RELATED GUIDES:
- How to Get Printer Online Issue on Mac
- How To Fix Windows 11 Printer Spooler Error
- How to Get Printer Online on Windows 10 (Offline to Online)
- How to Fix HP Printer Not Showing Up on Network
- How to Fix Error 740 While Adding Printer on Windows 10/11
This is how you can install Windows 11 printer drivers. We hope this article helps you with installing Windows 11 printer drivers.
