- Drivers are essential for hardware functionality on Windows PCs such as graphics and audio cards.
- Updating drivers can be done through Windows Update, device manager, third-party software, or hardware websites.
- Following specific steps for each method can help keep drivers up to date for optimal PC performance.
Just like operating systems, drivers are also an important PC component. Windows PCs have drivers for all the hardware, including the graphics card, audio card, network adapter, Bluetooth device, etc. These drivers enhance the functionality of the hardware present on your system. You must update these drivers to maintain the longevity of the hardware and for the best experience for your Windows PC.
There are multiple ways to update the drivers on Windows PC. You can update the drivers through the Windows Update , device manager, or third-party software or download the update from the official website of your hardware.
How to Update Drivers on Windows 11/10
If you are here looking for a guide to help you update drivers on Windows 11/10, then you are at the right place.

Update Drivers Through the Device Manager
Device Manager is an in-built tool on Windows PC that one can use to manage the hardware connected to their PC. This can be used for various tasks like reinstalling the driver, disabling the device, and even updating the driver. To update the drivers through the device manager, follow the steps given below-
- Press Windows + X keys together on your keyboard, and then click on Device Manager from the menu that opens up.

- Now, navigate to the device driver that you want to update.
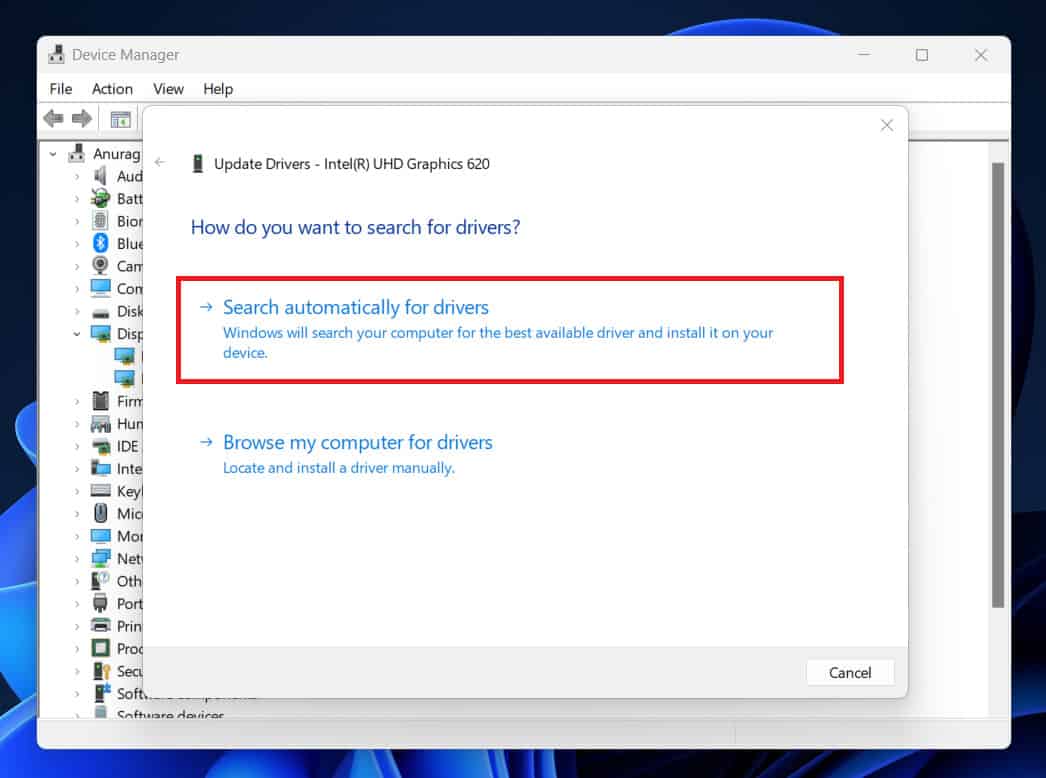
- Right-click on the driver you want to update and then click on Update Driver .

- Now, click on Search automatically for drivers to download the drivers from the internet.
Update Drivers Through Windows Update
You can also update the drivers on your Windows 11 PC through Windows Update. With Windows Update, you get cumulative and security updates on your Windows PC and the driver update. Below are the steps to update the drivers through the Windows Update on Windows 11 and Windows 10.
Windows 11
- Press the Windows key on your keyboard, then click the Settings icon on the Start Menu .
- On the left pane of Settings, click on Windows Update .
- Under the Windows Update section, click on the Check for Updates button.

- This will list all the updates, including the available driver updates.
- Install the driver updates and then restart your PC to save the changes.
Windows 10
- Open the Settings app on your Windows PC. You can do this by pressing Windows + I keys together.
- Here, click on the Update & Security option.

- Ensure you are on the Windows Update section on the left sidebar.

- On the right side, click on the Check for updates button.

- Now, download and install all the driver updates available.
Update Drivers Using Third-Party Software

There are various third-party softwares available to download driver updates on your PC. You can use apps like DriverPack Solution and Driver Booster to update the drivers on your system. You will have to download these softwares from their official website. Once you install the software, you can run the scan. The software will scan for available driver updates, and you can then install them.
Update Drivers Through Hardware Website
Another way to update drivers is through the website of the hardware you are using. For instance, if you are using an NVIDIA graphics card, you can head to the NVIDIA download page. There you will have to fill in the details of your NVIDIA graphics card, and you will be able to download the driver for your graphics card. Similarly, you can download the driver updates for all the hardware you use with your PC, but you must know about the hardware manufacturer and the model name.
If you have a laptop, then work becomes easier. On a PC, you will have to visit the website of every hardware individually and download the driver updates from there. In the case of a laptop, you can head to your laptop manufacturer’s website and visit your model page. You will get the option to download the drivers here. You can download and install all the drivers available for your laptop.
Conclusion
These were all the ways to update drivers on Windows 11 and Windows 10. Updating your drivers to the latest version is a must for a smoother experience on your Windows PC, and if you don’t know how you can do so, then the above article should help you with it.
How to Download Android USB Drivers for Windows and Mac
How To Update Drivers In Windows 11 Properly and Safely
How To Install Bluetooth Driver Windows 11
Is Driver Easy Safe? Pros, Cons & Downloading Speed 2023
How to Fix Missing @system32driverspci.sys Error
How To Delete Printer Driver In Windows 11
How To Disable Antivirus on Windows 11/10
Deleting printer drivers in Windows 11 can fix printer-related issues
Use the Settings app to delete printer drivers easily:
Open Settings using Windows + I
When there’s some problem with the printer, and you cannot use it on your PC, the best way to fix the issue would be to remove the printer driver. Well, many people prefer removing the printer and then installing it again, and to some extent, that can do the job if the issue is not due to the hardware issues. If you have been facing issues with the printer and want to delete the printer driver, fortunately, you do have the option to do so.
Delete Printer Driver In Windows 11
In this article, we will be discussing how you can delete a printer driver in Windows 11 .
Deleting Printer Driver Through The Settings App
The very first way to delete printer drivers is through the Settings app. To delete the printer driver through the Settings app, follow the steps given below-
- Press the Windows + I key to open the Settings app on your PC.
- Next, click on the Bluetooth & devices on the left sidebar of the Settings app.

- Now on the right side, click on the Printers & Scanners. You will see a list of all the printers you have added to your PC.

- Click on the printer for which you want to delete the driver. Now, click on the Remove button next to the printer to remove it along with the drivers associated with it.

- If you are asked to confirm deleting the printer driver, click on Yes. Once done, restart your PC for the changes to take effect.
Deleting Printer Driver Using Print Management
Another way to do so is by using print management. Follow the steps given below to delete the printer driver using the print management-
- Press the Windows key on your keyboard to open the Start Menu. In the Start Menu, search for Print Management and then click on it to open the app window.
- Expand the Custom Filters section on the left sidebar of the Print Management app window.
- You will now see a list of all the printer drivers on your PC.
- Select the drive that you want to remove from your PC. Right-click on it, and then click on the Remove Driver Packager option.
- You will be asked to confirm removing the driver. When asked to confirm your choice, click on Yes.
- This will delete the printer driver from your PC.
Deleting Printer Driver Using Command Prompt
You can also delete the printer driver using the Command Prompt. Given below are the steps to delete the printer driver using the Command Prompt-
- You will have to launch the Command Prompt as administrator. To do so, open the Start Menu and search for CMD. Now, right-click on the Command Prompt and click on Run as administrator.

- In the Command Prompt, type the command wmic printer get name and hit Enter to execute.
- You will now see the list of all the printers on your PC.
- Next, type the command printui.exe /dl /n “YOUR-PRINTER-NAME” and execute it. You will have to ensure you replace YOUR-PRINTER-NAME with the printer’s name that is displayed on the list.

- The printer will now get removed. Ensure you restart your PC after doing so.
Deleting Printer Driver Using PowerShell
The last way to delete the printer driver is by using PowerShell. You can do so by following the steps given below-
- Press the Windows + X key combo, and then from the menu, select Windows Terminal (Admin).
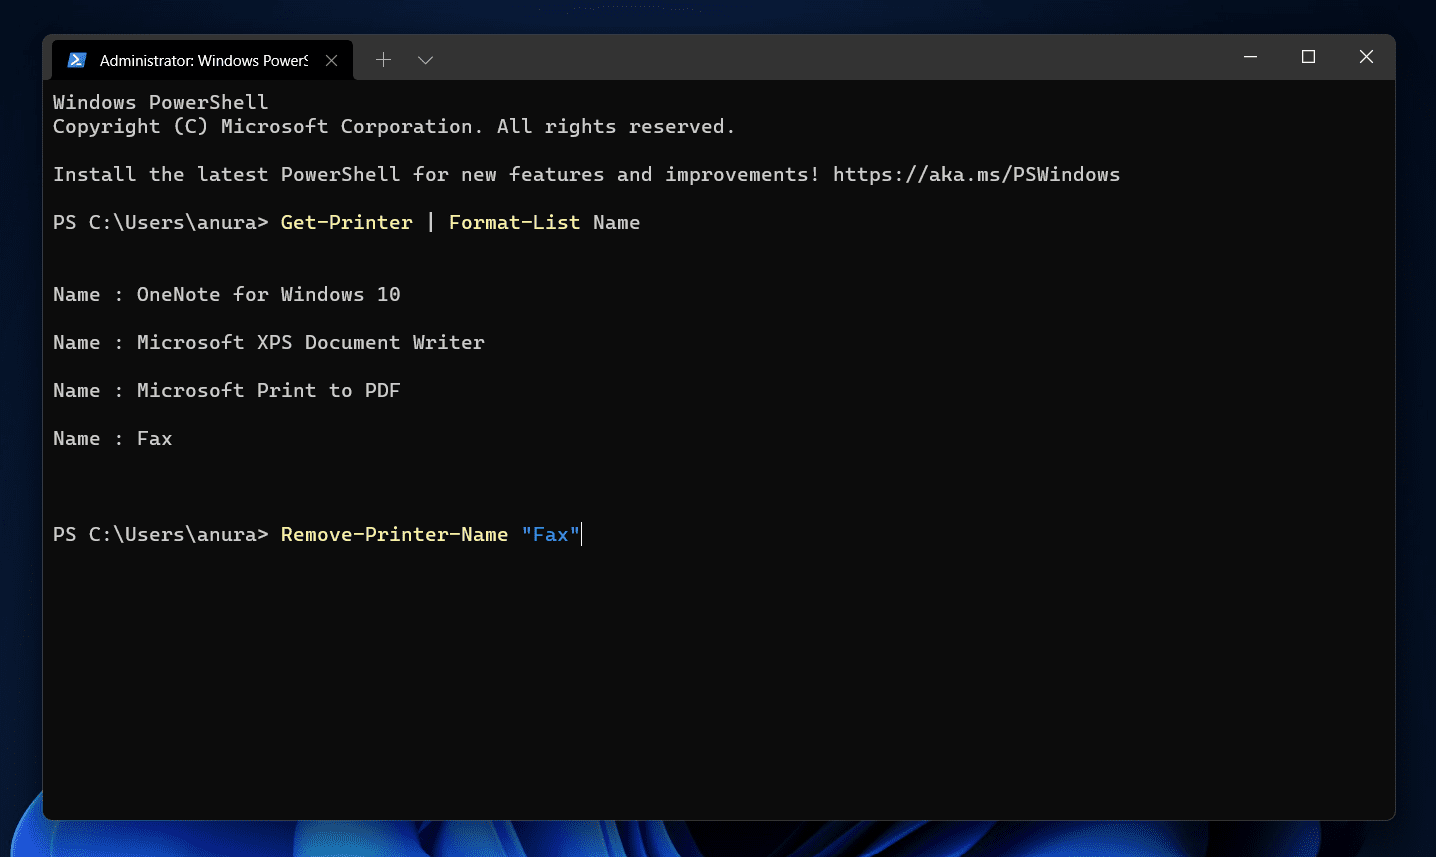
- Now enter the command Get-Printer | Format-List Name in the Windows PowerShell and hit Enter to execute the command.
- Next, type the command Remove-Printer-Name “Your-Printer-Name” and hit Enter. Ensure you replace Your-Printer-Name with the name of the printer you see here.
- This will remove the device along with its driver.
RELATED GUIDES:
- How to Create PDF File in Windows 11
- How to Install Windows 11 Printer Drivers Easily
- How to Fix Windows 11 Printer Spooler Error
- Top 5 Ways to Fix Windows 11 23H2 Copilot Not Showing
Final Words
This is how you can delete the printer driver on Windows 11. We have discussed the four ways to delete printer drivers in Windows 11 easily. Following the above steps, you will remove the printer driver in Windows 11.
