- Graphics card updates are essential for Windows PCs to avoid issues like screen flickering, stuttering, and performance lags.
- Ways to update AMD drivers on Windows 11 and 10 include using Windows Update, Device Manager, AMD’s official website, and third-party software.
- Updating AMD drivers ensures better performance in gaming and other GPU-intensive tasks while preventing potential problems like BSOD errors and frame drops.
Searching for how to update AMD drivers on Windows PC? Graphics card is essential for Windows PC for tasks that require video processing like video editing, gaming, etc. Graphics cards from AMD and NVIDIA are commonly used by everyone. Your graphics card must be updated to the latest version, else you can face issues like screen flickering, stuttering, frame drops, BSOD errors , performance lags, etc.
If you have an AMD graphics card, then you will have to update it to the latest version to avoid such issues. Updating AMD graphics drivers will not only solve such issues but also give you better performance while gaming and doing other GPU extensive tasks. In this article, we will guide you through all the ways to update AMD drivers on Windows 11 and Windows 10 .

How to Update AMD Drivers On Windows 11 & 10
There are multiple ways to update AMD drivers; you can do it from the device manager, Windows Update, the official site, AMD driver manager, or third-party software.
Update AMD Drivers Through Windows Updates
When you scan for Windows update, your PC will also show you all the available driver updates. You can then download and install the latest AMD drivers. Here’s how-
- Open the Settings of your Windows PC by pressing the Windows + I key combo.
- Click on the Windows Update button on the left.
- Now, click on Check for Updates button.
![How To Update AMD Drivers On Windows 11 & 10 [All Ways] - 3](https://itechhacks.com/wp-content/uploads/2023/08/Check-For-Updates.png)
- You will see all the updates available here.
- Install all the updates available here by clicking on Download and Install button.
Update AMD Drivers Through Device Manager
Device Manager can be used to manage all the hardwares connected to your PC. You can also update the AMD drivers through the Device Manager . Given below are the steps to do so-
- Press Windows + X key combo and then in the menu click on Device Manager .

- Expand Display Adaptors section by double-clicking on it.

- Right-click on your AMD graphics driver and then click on Update Driver .

- Now, click on Search Automatically for Drivers .

- This will search for the driver update online and install them on your PC.
Update Drivers Through AMD Official Website
You can download the driver update from the official website of the AMD and install it. You can follow the steps given below to do so-
- Click on this link to head to the AMD Drivers and Support page.
- Here, click on the drop-down menu next to ‘Search for your product’ and search for and select the graphics card you have.
![How To Update AMD Drivers On Windows 11 & 10 [All Ways] - 13](https://itechhacks.com/wp-content/uploads/2023/08/Select-Driver.png)
- Click on the Submit button.
![How To Update AMD Drivers On Windows 11 & 10 [All Ways] - 15](https://itechhacks.com/wp-content/uploads/2023/08/Submit.png)
- You will see updates for Windows 11, Windows 10, Ubuntu , etc. If you have Windows 10 then click on Windows 10 option, and if you have Windows 11 then click on Windows 11 option.
![How To Update AMD Drivers On Windows 11 & 10 [All Ways] - 17](https://itechhacks.com/wp-content/uploads/2023/08/Driver-Version.png)
- Click on the Download next to the update you want to download.
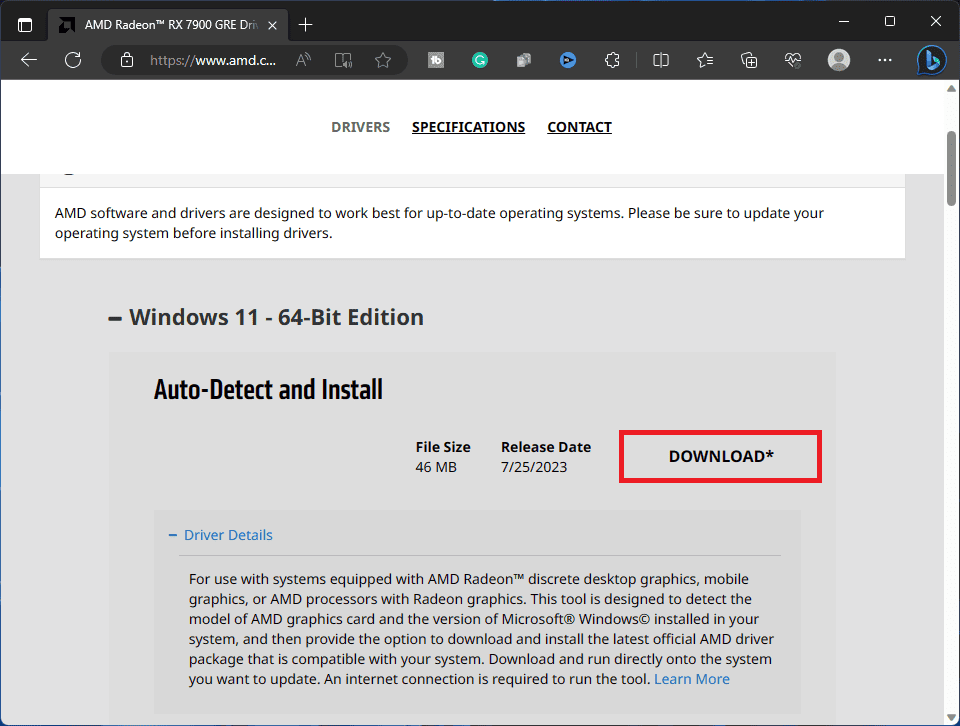
- Once downloaded, head to the location where setup has been saved.
- Now, double-click on the setup file to run the installation wizard.
- Follow the on-screen instructions to update the driver.
Update Drivers Through AMD Driver Manager
If you have AMD driver, then you will have AMD driver manager (or AMD Radeon Settings). You can use it to update the driver and tweak other graphics card settings. Follow the steps given below to update the AMD driver through AMD driver manager-
- Right-click on the desktop and then click on AMD Radeon Settings from the context menu.
- Click on Updates , and then on Check for Updates .
- Now, you can follow the instructions on the screen to update the driver to the latest version.
Steps To Update AMD Drivers Through Third-Party Driver Updater

There are multiple third-party driver updating softwares like Driver Booster and DriverPack Solution that you can use to update the AMD drivers. You can download the software from the given link.
Once the software has been downloaded, run it to scan for available driver updates and install them. This software scan for all the latest available updates, and you can install them.
Bottom Line
Above were all the ways to update the AMD drivers on Windows 10 and Windows 11. You can now update the AMD drivers to the latest version through the methods we have mentioned above and avoid GPU issues on your PC.
Does Windows 11 Support AMD Drivers?
Yes, Windows 11 support AMD drivers. If you have AMD graphics card on your Windows 11 PC then you install the AMD driver on your PC.
Why Should I Update AMD Drivers?
Outdated drivers can cause various issues like screen stutter , FPS drops , and blue screen of death . Even if you have a top-of-the-line AMD graphics card, you are likely to face issues if you haven’t updated the driver. Updating the AMD drivers to the latest version can only avoid such issues.
How To Update AMD Drivers Manually?
If you want to update the AMD drivers manually then you can do it from the AMD website or AMD driver manager. We have discussed all the ways to update AMD drivers in the article abovel you can follow them to update the drivers.
5 Safe Ways to Update Windows 11 Drivers Properly
6 Best Ways To Update Network Drivers in Windows 11
What is NVIDIA Virtual Audio Device and How to Update/Uninstall It
How To Roll Back NVIDIA Drivers On Windows 11 (Manually)
How To Install Bluetooth Driver Windows 11
4 Ways To Install Windows 11 Printer Drivers Easily
Printer drivers are essential for keeping your printer functional and bug-free.
Update printer drivers through Windows update by accessing Settings, checking for updates, and installing the driver.
Other methods include downloading drivers from the official website, using a disk to install drivers, or utilizing third-party driver updater software like Driver Booster.
If you are an office person, student or someone, whose main part of the job is printing, then you will need to have updated your printers drivers. Printer drivers are essential to keep your printer functional and updated with all the latest features. Updating the printer drivers ensures that your printer functions and remains bug-free. There are various ways to update printer drivers, you can do it manually as well as with the help of a third-party driver updater.
How To Install Windows 11 Printer Drivers
In this article, we will be discussing how you can install Windows 11 printer drivers.
Updating Printer Drivers Through Windows Update
The very first way to update printer drivers is through the Windows update. Windows update not only brings the updates for Windows but it also brings all the drivers updates for the hardware installed on your PC. To install Windows 11 printer drivers through Windows update, follow the steps given below-
- Head to the Settings app on your PC. To do so, search for Settings in the Start Menu or press the Windows + I key combo. This is the shortcut key to open the Settings app.
- Now in the Settings, click on the Windows update on the left sidebar.
- On the right side of the Settings, click on Check for updates. You will see all the updates for your PC listed here. You will also see an Option updates section here. Click on it, and this is where you will see the driver update.

- Look for your printer drivers here. Download and install your printer drivers.
- After done, close the Settings app and then restart your PC to make the changes.
Download The Drivers From The Official Website
Another way to do this is by downloading the drivers from the official website of your printer’s manufacturer and then installing it. To do so, follow the steps given below-
- Firstly, visit the official website of your printer. For instance, if you are using the printer from Canon, Epson, HP, or any other website, then head to their official website for the printer.
- Now search for your model of printer, and open it. If you don’t know what is the model of your printer, then you can check for it on the printer box. Generally, the model is mentioned on the body of the printer, so you can check that as well.
- Here, you will see the download section, click on it. You will find the drivers for your printer here.
- Download the driver for your printer.
- Now head to the location where you have saved the file, and run the setup by double-clicking on the file.
- Follow the on-screen instructions to install the drivers for your printer.
Use The Disk To Install Drivers
Whatever printer you are using, will have a disk with all the essential drivers required. You should find it inside the box. To follow this step, you must ensure that your PC has a CD driver, else you won’t be able to install drivers using this method.
- Insert the disk into the disk drive of your PC.
- Now open the file explorer on your PC by pressing the Windows + E key combo. You can either search for File Explorer in the Start Menu and open it.
- Double-click on the Disk Drive icon on the File Explorer to run the setup.
- Follow the on-screen instructions to run the setup, and install the printer drivers on Windows 11.
Using Third-Party Driver Updater
Another way to do this is by using third-party driver updater software. There are various third-party driver updater software like Driver Booster or Driver Pack Solution. You can use either of this software to update or install Windows 11 printer drivers.
Download either the Driver Booster or the Driver Pack Solution from their official website. Download and install any of these apps on your PC. When you run the app, you will see the option to scan your PC for outdated or missing drivers. Click on this button. You will have to connect your PC to a stable internet connection.

After the software scans your PC for all the drivers required to be installed or updated, you will see a list of drivers. Select the printer driver, download it and install it. You will be asked to restart your PC. Restart to make the changes, and you will have successfully installed Windows 11 printer drivers.
RELATED GUIDES:
- How to Get Printer Online Issue on Mac
- How To Fix Windows 11 Printer Spooler Error
- How to Get Printer Online on Windows 10 (Offline to Online)
- How to Fix HP Printer Not Showing Up on Network
- How to Fix Error 740 While Adding Printer on Windows 10/11
This is how you can install Windows 11 printer drivers. We hope this article helps you with installing Windows 11 printer drivers.
