- Pop-up ads on Windows 11 can be annoying and disruptive to workflow
- To stop pop-up ads, turn off notifications from apps and sync provider notifications
- Additionally, turn off tips and suggestions, app access to advertising ID, and block pop-ups from browsers
Ads are something that no one will want to see on their device while they are using it. Pop-up ads are not only annoying but their random popping up can disrupt the complete workflow. Windows 11 brings it all to the users, from a better UI to more features than the previous version, but the only thing that can be annoying with it is the pop-up ads. Yes, there are pop-up ads on Windows 11 which you may see here and there. Fortunately, with the help of a few tweaks, you will be able to stop pop-up ads in Windows 11.
How to Stop Pop-Up Ads On Windows 11
This article will be your guide to help you stop pop-up ads on Windows 11 .
Turn Off Notifications From Apps
The apps installed on your PC can send you random notifications which may be quite annoying. Many times the source of these random notifications and pop-ups may be the browser. You should try turning off notifications from apps completely to stop getting these notifications. To do so, follow the steps given below-
- You will have to open the Settings app on your PC. To do so simply press the Windows + I key combo.
- Click on the System tab on the left sidebar and then on the right side click on Notifications.

- Here, turn off the toggle of the Notifications. This will turn off the notifications from all the apps.

Turn Off Sync Provider Notifications
Not only the notification may appear as pop-ups but you may also find them in File Explorer. If you are getting pop-up ads on File Explorer in Windows 11 then you can simply stop them by turning off sync provider notifications. To turn off sync provider notifications in File Explorer, follow the steps given below-
- Open the File Explorer by pressing the Windows + E key combo.
- Click on the three ellipses at the toolbar on the top of the File Explorer, and from the menu that opens up, click on Options. This will open the Folder Options app window.
- Click on the View tab in the Folder Options.
- Next, under the Additional Settings section, uncheck the Show Sync provider notifications.

- After doing so, click on Apply and then on OK to save the changes.
Turn Off Tips And Suggestions
Another thing that you can try doing is turning off tips and suggestions. Tips and suggestions may also send annoying pop-ups on Windows 11. You can turn off tips and suggestions by following the steps given below-
- Press the Windows + I key combo to open the Settings app on your Windows 11 PC.
- On the right side of the System tab in the Settings app, click on Notifications.
- Scroll down to the bottom, and then uncheck the checkboxes saying Get tips and suggestions when I use Windows as well as Offer suggestions on how I can set up my device.

Turn Off App Access To Your Advertising ID
You should also try turning off the app access to your advertising ID to stop pop-up ads on Windows 11. To turn off app access to your advertising ID, follow the steps given below-
- Open the Settings app by pressing the Windows + I key combo.
- On the left panel of the Settings app, click on Privacy & Security in the left sidebar.
- Now on the right side, click on the General button.

- On the next window, turn off the toggle for the Let Apps show me personalized ads by using my advertising ID.

Block Pop-Ups From Browser
You may also get pop-ups from the browser. Therefore, you will have to block pop-ups from the browser. You will have to do so from the Settings of your browser. We will be discussing steps to block pop-ups from Microsoft Edge as well as Google Chrome. Given below are the steps to block pop-ups from the Microsoft Edge-
- Open the Microsoft Edge on your PC, and then click on the three ellipses on the top right corner of the window.
- Now, click on the Settings option from the menu that opens up.
- Click on the Cookies and site permissions on the left sidebar of the Settings.

- Now on the right side, click on the Pop-ups and redirects.
- On the next screen, turn on the toggle for Block (recommended).

- Head back, and then click on the Ads option. Here, turn on the toggle for Block on sites that allow ads.

To turn off the pop-ups from Google Chrome, follow the steps given below-
- Open Google Chrome on your PC and then click on the three ellipses on the top right corner of the window.
- Click on the Settings app from the menu that opens up.
- Head to the Privacy and Security section, and then click on Site Settings.
- Here, scroll down to Pop-ups and Redirects options.
- Next, select Don’t allow sites to send pop-ups or use redirects.
RELATED GUIDES:
- How To Add Wireless Printer In Windows 11
- 15 Best TuneUp Utilities for Windows 10/11 to Boost Performance
- How To Fix Kernel Security Check Failure In Windows 11
- How To Install Codecs On Windows 11
Final Words
This is how you can stop pop-up ads on Windows 11. If you have been getting pop-up ads again and again on Windows 11, then you can try disabling them. We have discussed the step-by-step process to stop pop-up ads on Windows 11.
- Wireless printers can be added to your Windows 11 PC for wireless printing convenience.
- Follow steps to manually add a wireless printer in Windows 11: Open Settings, go to Bluetooth & devices, click on Printers & scanners, and Add device.
- If the printer isn’t listed, add it manually by selecting Add a Bluetooth, wireless, or network discoverable printer and following the prompts to successfully add the printer.
Today’s printers have both wired and wireless connections that you can use to connect them to your computer. After connecting the wireless printer to your wireless network, you can print wirelessly from anywhere in your house. You may want to add your wireless printer to your PC if you have a new printer or if you have recently installed Windows 11 on your system. If you wish to install a wireless printer to Windows 11 without know-how, this article will guide you through the process.
How To Add a Printer to Windows 11
This article will go through how to set up a wireless printer in Windows 11.
Adding Wireless Printer In Windows 11
Most probably, Windows 11 should find the wireless printer once your PC and the printer are connected to the same Wi-Fi network. However, if the wireless printer is not added automatically in Windows, then you can follow the steps given below to add the wireless printer in Windows PC manually-
- Open the Settings app on your PC by pressing the Windows + I key combo. Then, you can either search for the Settings app in the Start Menu or hit Enter to open the Settings app.

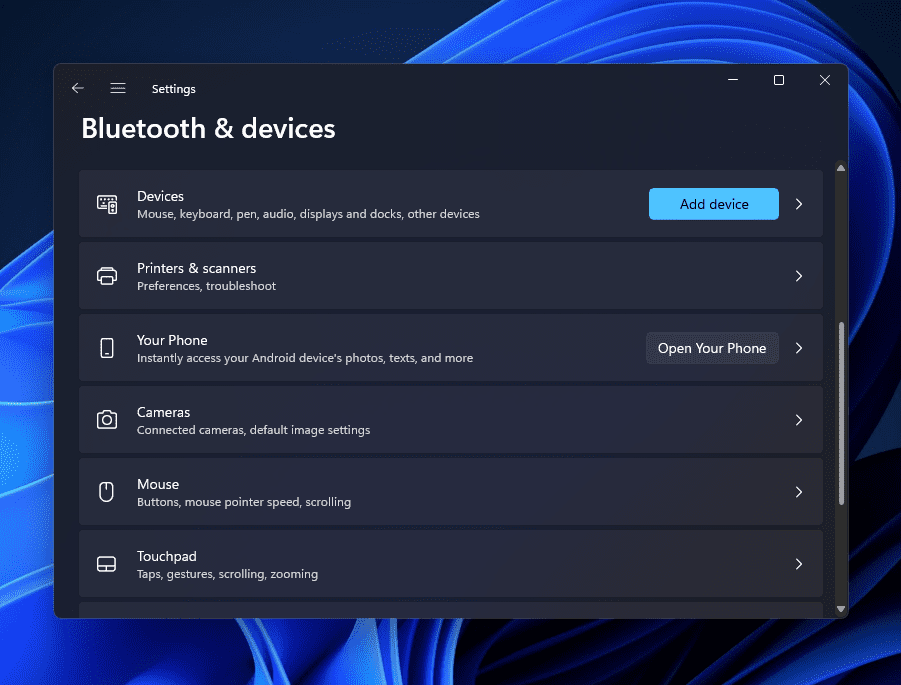
- Head to the Bluetooth & devices section from the left sidebar of the Settings app, and then on the right side, click on Printers & scanners.
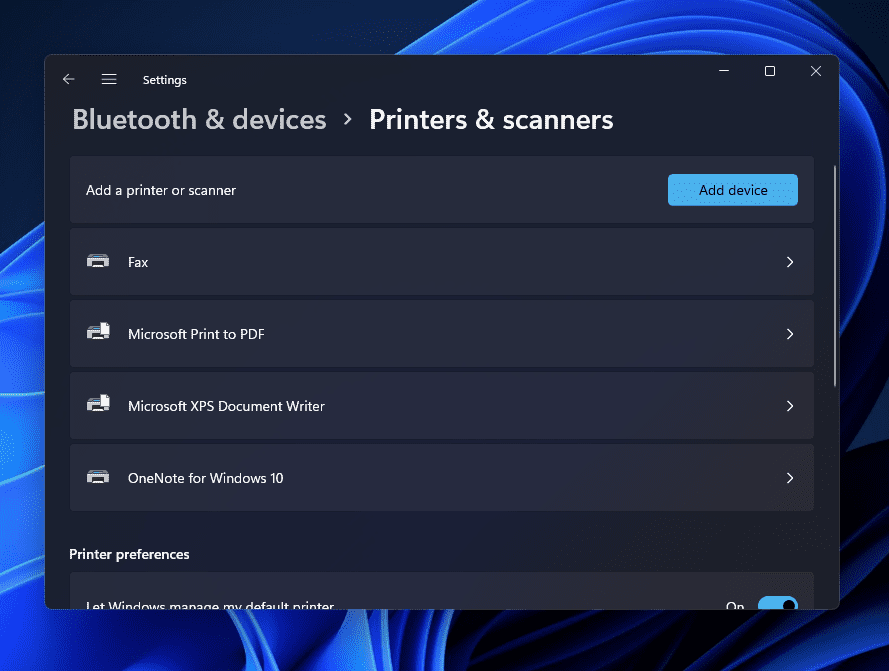
- Click on the Add device button next to the Add a printer or scanner option.
- You should now find the printer listed here. If you get a message saying ‘The printer that I want isn’t listed , then click on Add Manually button.
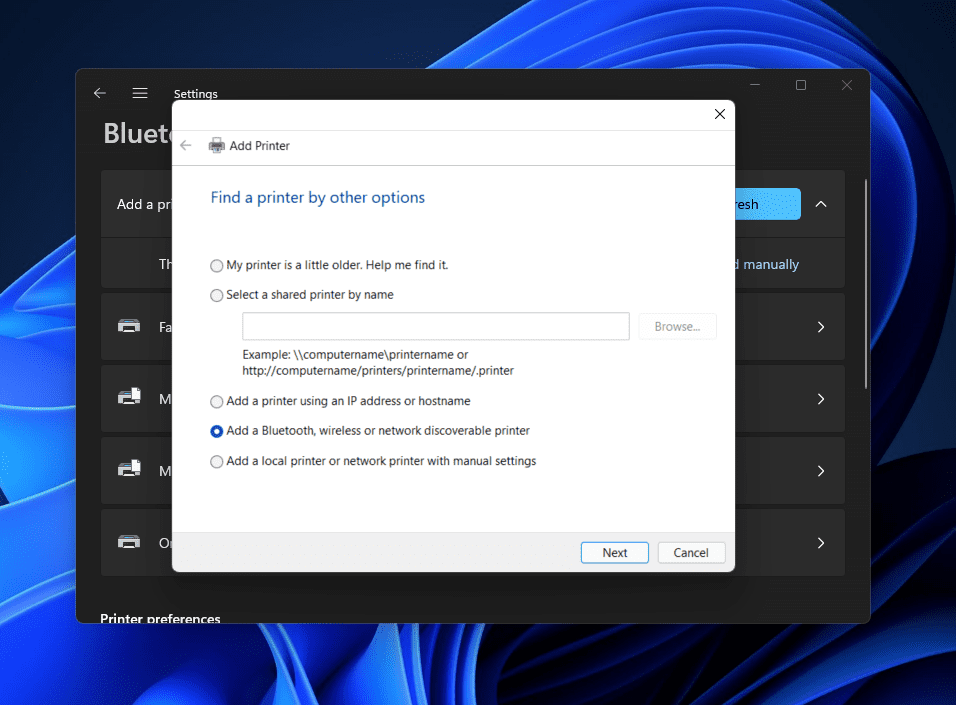
- Select the Add a Bluetooth, wireless, or network discoverable printer and then click on the Next button on the next window.
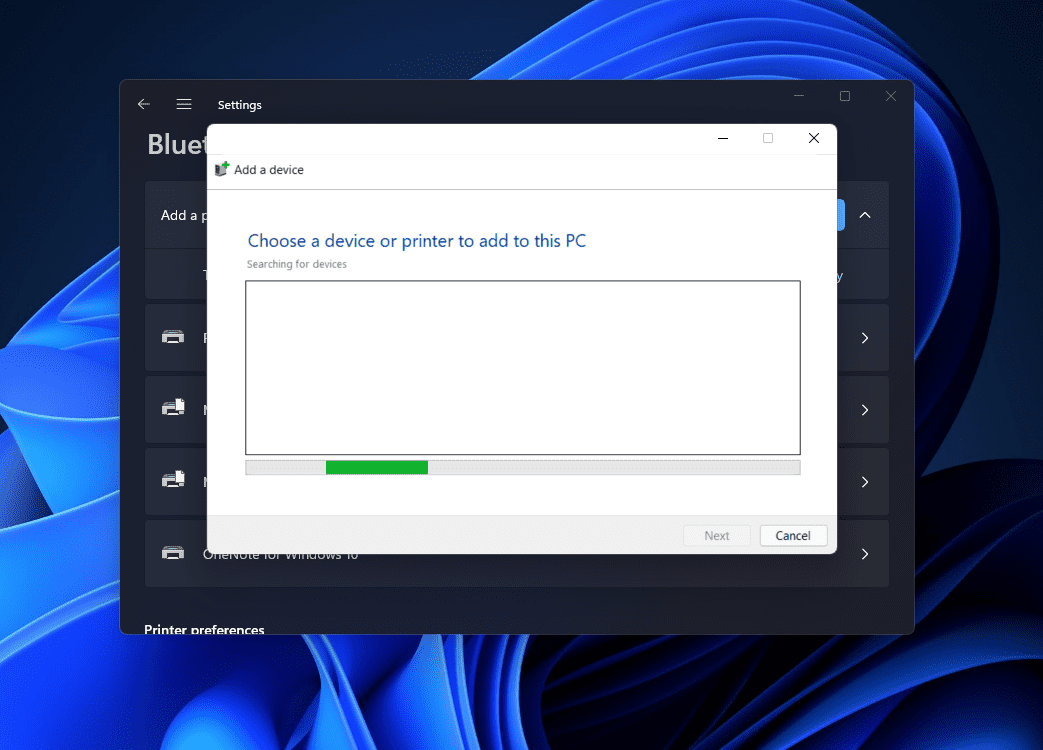
- Next, you will see your printer listed. Select the printer you want to add to your PC from the list and click on Next.
- If Windows 11 locates the printer through the IP address but cannot get the driver’s location, then click on Have Disk button to install the printer software manually.
- Once done, the printer will be added to Windows 11 successfully.
Suppose no printer is found even after trying all the above steps. In that case, you should probably try downloading the printer software/driver from the internet.
RELATED GUIDES:
- How To Delete Printer Driver In Windows 11
- How To Install Windows 11 Printer Drivers Easily
- Top 10 Best Audio Voice Recorder for Windows 11 PC
- How To Fix Windows 11 Printer Spooler Error
- How to Get Printer Online Issue on Mac
Bottom Line
If you have a wireless printer that you want to add to Windows 11, this article might prove helpful. In this article, we have discussed the complete step-by-step process to add a wireless printer to your PC. You can follow the steps given above to add a wireless printer to Windows PC.
