- Facebook not working on Chrome is a common issue faced by users due to browser cache, extensions, or DNS settings.
- To fix this, methods such as restarting Chrome, clearing cache data, changing DNS settings, disabling/uninstalling extensions, syncing system date/time, and resetting Chrome can be employed.
- These troubleshooting steps aim to resolve the Facebook not working on Chrome problem effectively, ensuring a smooth browsing experience for users.
Despite being one of the best browsers worldwide, Google Chrome still has a lot of bugs its users face now and then. The majority of internet users prefer using Chrome to browse the internet. Some of them also prefer using Facebook on the browser instead of the app. But recently, many users have been complaining about Facebook not working on Chrome. If you are also facing this, keep reading to know how to fix it.
It could be frustrating if Facebook suddenly stops working on your browser. Usually, this happens due to the browser cache data or third-party extensions interfering with Chrome resources. However, there are other reasons to cause this issue. In this post, we have compiled a list of some troubleshooting methods that may help you fix Facebook not opening on the chrome browser.
Fix Facebook Not Working on Chrome Browser
Below is a list of some workarounds that may help you fix Facebook not working on Chrome
Restart Google Chrome
If Facebook doesn’t open on Google Chrome even after trying multiple times, restart your browser. It’s possible that Chrome was unable to access some files in the current session, and it was making Chrome misbehave. Restart the Chrome browser and check if the issue is fixed.
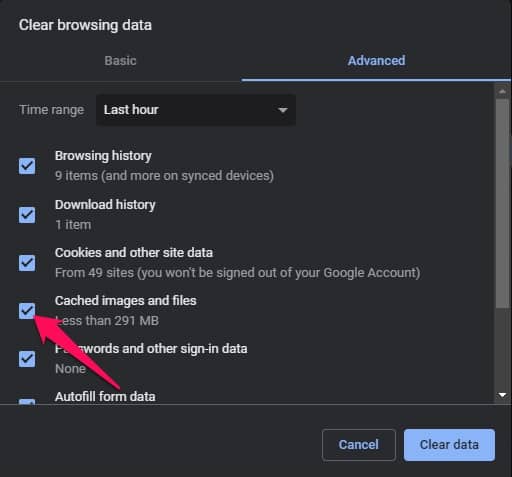
Clear Chrome Cache Data and Browsing History
Corrupted cache and browsing data can cause Facebook not to work on Chrome. Delete your browser’s cache and browsing data as it won’t affect your browser in any shape. Here is how you can clear cache and browsing data on Google Chrome:
- Open Chrome browser and click on three dots at the top right corner.
- Go to Settings > Security and Privacy .
- Click on Clear browsing data .
- Navigate to the Advanced tab and click on Clear Data .
Change DNS Settings
DNS or Domain System Name is the list of records accessed from the ISP when required. A slide alteration in DNS settings could lead to multiple errors on the Chrome browser. Where is how you can change the DNS settings:
- Press Windows key + I to open Settings .
- Navigate to the Network & Internet tab and click on Advanced Network Settings .
- Select the network you are currently connected with.
- Click on View Additional Properties .
- Click on Edit beside DNS server assignment .
- Change the DNS to Automatic (DHCP) and click on Save .
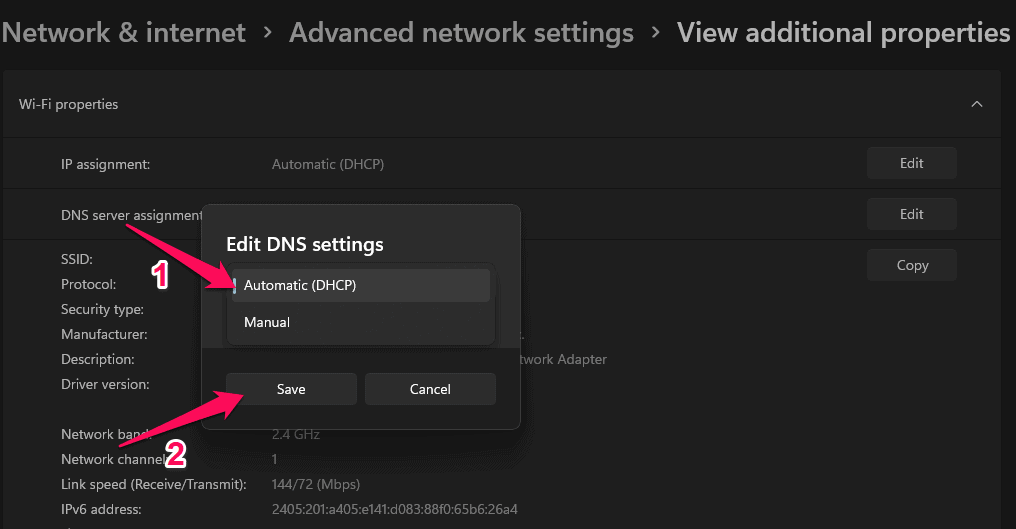
- Once done, restart the Chrome browser and check if Facebook opens.
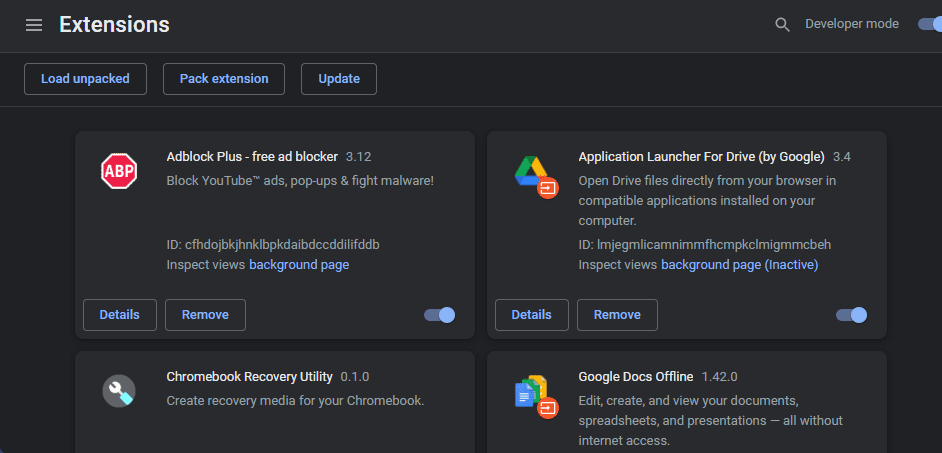
Disable or Uninstall Extensions
Chrome Extensions aim to enhance our web browsing experience and tasks. However, sometimes some extensions could interfere with the functioning of Chrome. To ensure an extension isn’t causing this issue, disable all extensions one by one and check a Facebook starts working. If Facebook starts working after disabling a particular extension, uninstall the extension. Here is how you can do it:
- Click on the Extensions icon in the Chrome browser.
- Click on Manage extensions .
- Switch off the toggle under each extension to disable it.
- To uninstall an extension, click on the Remove option.
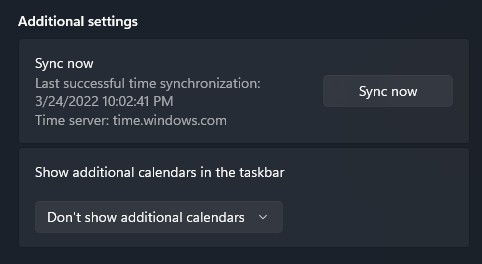
Sync System Date and Time
If your system’s date and time are not synchronized, you can face this error. Here is how you can check and fix it:
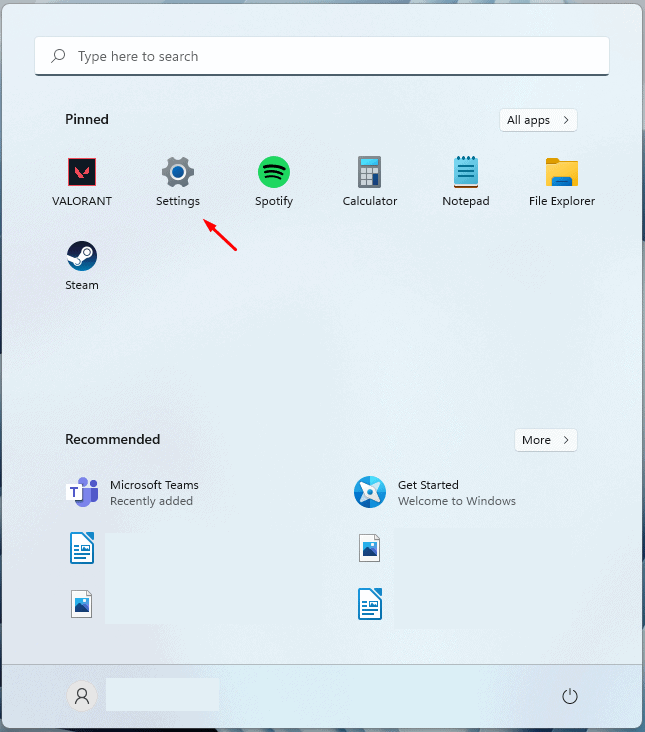
- Click on Start and open Settings .
- Navigate to Time & Language .
- Scroll down and click on Sync now under Additional settings .
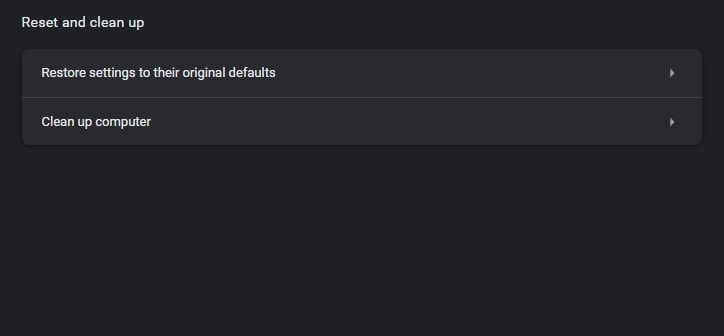
Reset Chrome
If none of the above-mentioned steps could fix this issue, reset your browser to its default settings. Here is how you can do it:
- Open Google Chrome and click on the three vertical dots menu at the top right corner.
- Click on Settings .
- Now Navigate to Advanced > Reset and clean up .
- Now click on Restore settings to their original defaults and follow the on-screen instructions.
Conclusion
This was all about how to fix Facebook not opening or working on Chrome . We hope that the troubleshooting methods mentioned above variable to solve this issue. Still, if you have any doubts, feel free to drop a comment below.
RELATED GUIDES:
Disable Software Reporter Tool in Chrome High CPU Usage
How To Fix Plex TV Link Not Working Problem
Fix Fingerprint Sensor Not Working in Windows 11
How To Allow Chrome To Access The Network In Your Firewall
Fingerprint sensors on Windows 11 make sign-ins faster and more secure, but sometimes they stop working — often due to dirt, bugs, or outdated drivers.
Simple fixes like cleaning the sensor and restarting the PC can help with minor glitches, while updating Windows and the fingerprint driver often solves deeper issues.
If nothing else works, reinstalling the fingerprint driver in Windows 11 may be the final step needed to get it working again.
These days, most Windows PCs come with a fingerprint sensor for added security and quick sign-in without needing to type your PIN every time. It’s all part of Windows Hello, which is Microsoft’s built-in security system. While fingerprint sensors on Windows 11 are meant to make things more secure and convenient, they don’t always work smoothly.
On some laptops, the fingerprint sensors just aren’t as reliable as the ones on smartphones. Users have been reporting that the sensor doesn’t always detect their fingerprint, or it takes multiple tries before unlocking. For a lot of people, the Windows 11 fingerprint sensor not working has become a common and frustrating issue.
Fingerprint Sensor Not Working in Windows 11
If you have made your way to this article, you were probably facing issues with the fingerprint sensor on your PC. Well, you need not worry about it if your Windows 11 fingerprint sensor is not working. In this article, we will be discussing how you can fix Windows 11 fingerprint sensor not working.
Why You May Face This Issue?
There are many reasons as to why you may face Windows 11 fingerprint sensor not working issue. You may face this issue due to a dirty fingerprint sensor. When the fingerprint sensor on your PC is dirty, it may not be easy to recognize fingerprints, and it may not work.
Another reason for you to face this issue is because of the temporary bugs. There may be certain temporary bugs that may interrupt the well functioning of the fingerprint sensor and may cause an issue with it. Also, due to outdated fingerprint drivers or corrupted drivers, you are most likely to face this issue.
Fixing Windows 11 Fingerprint Sensor Not Working
Now that you know what is causing the issue, we can continue fixing the Windows 11 fingerprint sensor not working.

Try Basic Fixes
Firstly, you should try cleaning the fingerprint sensor of your PC. As we have already discussed, you may face this issue due to the dirt and grease stuck on the fingerprint sensor. You should clean the fingerprint sensor and then check if you still encounter the same error or not. You can use a cleaning solution to clean the fingerprint sensor.
However, if cleaning the fingerprint sensor didn’t work, then you should try restarting your PC. You may face this problem due to temporary bugs. These temporary bugs can easily be solved by restarting your PC. Restart your PC and check if the fingerprint sensor is working now or not. If the fingerprint sensor does not work after doing so, you should move to the next troubleshooting step.
Remove And Add Fingerprint
If you face a problem with the fingerprint, you should try removing the fingerprint from your PC and then add it again. To remove and add the fingerprint, follow the steps given below-
- Open the Settings on your PC by pressing the Windows + I key combo.

- Head to the Accounts section from the left sidebar in the Settings. Now click on the Sign-in options from the right side of the screen.
- Here, expand the Fingerprint recognition section. Click on Remove to remove the fingerprint. You will be asked to confirm removing the fingerprint.

- Now click on add a finger to add the fingerprint on your PC.
- Follow the on-screen instructions, and you will have successfully added a new fingerprint.
This should solve the issue for you. However, if you still face the same issue, you should move ahead to the next step.
Update Windows 11
If Windows 11 fingerprint sensor is not working, then it may be because of the outdated Windows. You should try updating the Windows and then check if the fingerprint works or not. To update the Windows , follow the steps given below-
- Head to the Settings app on your PC. Search for Settings in the Start Menu and open it.
- In the Settings, click on the Windows update option that you will find on the left sidebar.

- Now on the right side, click on Check for updates.

- Now download and install all the updates that your PC finds.
- After installing the updates, restart your PC, and the issue should be fixed.
Update The Fingerprint Driver
You may also face this issue due to outdated drivers. If this is the reason, you may try updating the fingerprint sensor driver, and the issue will be solved.
- In the Start menu , search for Device Manager and open it.

- In the Device Manager, expand the Biometric devices by double-clicking on them.
- Now, select the fingerprint driver, and right-click on it. Click on Update driver to update the fingerprint driver.

- After updating the driver, restart your PC, and try signing in with the fingerprint.
Reinstall Fingerprint Driver in Windows 11
If any of the above steps didn’t help you fix the issue, it might be because the fingerprint drivers on your PC are corrupted. You may try reinstalling the fingerprint driver to solve the issue. To reinstall the fingerprint driver, follow the steps given below-
- Open the Device Manager on your PC.
- Here, double-click on the Biometric devices to expand it.
- Right-click on the fingerprint driver, and click on Uninstall device.

- After uninstalling the driver, restart your PC.
- The drive will be reinstalled, and you will be able to check it from Device Manager.
- Now you can download your OEM Fingerprint driver and can install it. If you are not aware of driver installation then you can check our guide on How To Update Drivers In Windows 11 Properly and Safely.
RELATED GUIDES:
- How To Change Public VPN To Private In Windows 11
- How To Install Bluetooth Driver Windows 11
- How To Fix Windows 11 Keyboard Not Working
This is how you can fix Windows 11 Fingerprint sensor not working. We hope this article helps to fix the issue.
