- Resetting a MacBook Air erases all data, returning it to its original state; essential for selling or troubleshooting.
- Prerequisites include backing up data, signing out of iCloud, unpairing Bluetooth devices.
- To factory reset your MacBook Air, follow steps like pressing Command + R, selecting Disk Utility, erasing disk, reinstalling macOS.
Do you want to reset your MacBook Air to its original factory settings? Whether you’re planning to sell your MacBook, facing software issues, or just want a fresh start, factory resetting your MacBook Air is a clean way to start over.
In this step-by-step guide, we’ll show you how to factory reset MacBook Air in 20262 using the latest macOS Sequoia. It’s simple, safe, and takes just a few minutes if you follow the process correctly.
How to Reset MacBook Air to Factory Settings (2026 Guide)
This guide will walk you through the steps of factory resetting your MacBook Air.
Prerequisites To Take Care Of Before Resetting Your MacBook Air
Before you reset your MacBook Air, there are some prerequisites that you need to take care of. Ensure you take care of the following things, and then continue with resetting your MacBook Air-
- Firstly, back up your device. Factory resetting your MacBook Air will remove all of your files from your laptop. Therefore, it is essential to have a backup of your data before resetting your device.
- Before resetting your MacBook Air, you must sign out of iTunes, iMessage, and iCloud.
- Also, ensure that you unpair all your Bluetooth devices and then continue resetting your MacBook Air.
Factory Reset Your MacBook Air
Now that you have taken care of all the above things, you can reset your MacBook Air. To factory reset your MacBook Air, follow the steps given below-
Step 1: Enter macOS Recovery Mode
The method depends on your Mac’s processor.
For Apple Silicon (M1, M2, M3 chip):
- Shut down your MacBook Air completely.
- Press and hold the Power button until you see Loading startup options .
- Click Options and then click Continue .
For Intel-based MacBook Air:
- Press and hold Command (⌘) + R on your keyboard.
- While holding the keys, press the Power button to turn on your Mac.
- Release the keys when the Apple logo appears.
Step 2: Erase Your Mac’s Internal Storage
- Once you enter the macOS Utilities window, select Disk Utility and click Continue .
- In the sidebar, select your startup disk (usually called Macintosh HD ).
- Click Erase at the top.
- For Format, select APFS (recommended for macOS Sequoia and SSD-based Macs).
- For Scheme, select GUID Partition Map .
- Click Erase again to confirm. Wait for the process to complete.
- Click Done , then close Disk Utility.
Do not select “Mac OS Extended (Journaled)” unless you’re reinstalling an old version of macOS (before High Sierra).
Step 3: Reinstall macOS
- From the macOS Utilities window, click on Reinstall macOS Sequoia (or whichever version is shown).
- Click Continue .
- Agree to the terms and conditions.
- Select your erased startup disk when prompted.
- Click Install and let your Mac do the rest.
Your MacBook will restart multiple times during installation. Make sure it stays connected to power and Wi-Fi.
Step 4: Set Up Your Mac (Optional)
Once macOS is reinstalled, your MacBook Air will restart and show the setup screen.
You can now:
- Set up your Mac as new
- Or restore from a Time Machine backup if you saved one earlier
Conclusion
Resetting your MacBook Air might seem like a big step, but it’s actually quite simple when you follow the right steps. Whether you’re facing performance issues, preparing to sell your Mac, or just want a clean slate, a factory reset can help bring your MacBook Air back to its original state.
Just remember to back up your data, sign out of iCloud and other Apple services, and follow the reset steps carefully. With macOS Sequoia in 2026, the process is even smoother and more beginner-friendly.
RELATED GUIDES:
Is AppleCare Worth for MacBook Pro/Air or iPhone
How to Get Printer Online Issue on Mac
How To Get Apple TV+ Subscription for Free
Install Chrome OS Flex On Windows PC, MacBook
How To Change MAC Address of Android With or Without Rooting
Printer Offline error is a common issue on Mac and Windows, preventing document printing.
Method 1 involves accessing System Preferences, selecting the offline printer, and clicking ‘Resume Printer’.
Method 2 requires removing and re-adding the offline printer in System Preferences, while Method 3 suggests restarting the MacBook or iMac if previous methods fail.
When using a printer, you will come across several errors. One of the most frequently occurring errors while printing documents remotely is the Printer Offline error which is on Windows as well as on Mac. In this error, your printer will not print any document and a ‘Printer offline‘ message will be displayed on your screen. Recently we shared how to fix printer offline issues on Windows 10 . And in this tutorial, we have shared a simple guide by which you can fix printer online issues on your Macbook or iMac.
How to Get Printer Online Error on Mac
Method 1: Resume Printer.
Step 1- Open System Preferences on your Mac PC with the help of its icon in the Dock.
Step 2- Click on the ‘ Printers & Scanners ‘ option which you will find under the Hardware category.
Step 3- Now, select the printer which is offline and right-click on it. Then, select the ‘ Open Print Queue ‘ option to open the queue window of your Printer.
Step 4- At the top of the queue window, you will find a ‘ Resume Printer ‘ option. Click on it to turn your Printer online.
If your printer does not turn online, go to the next method listed below.
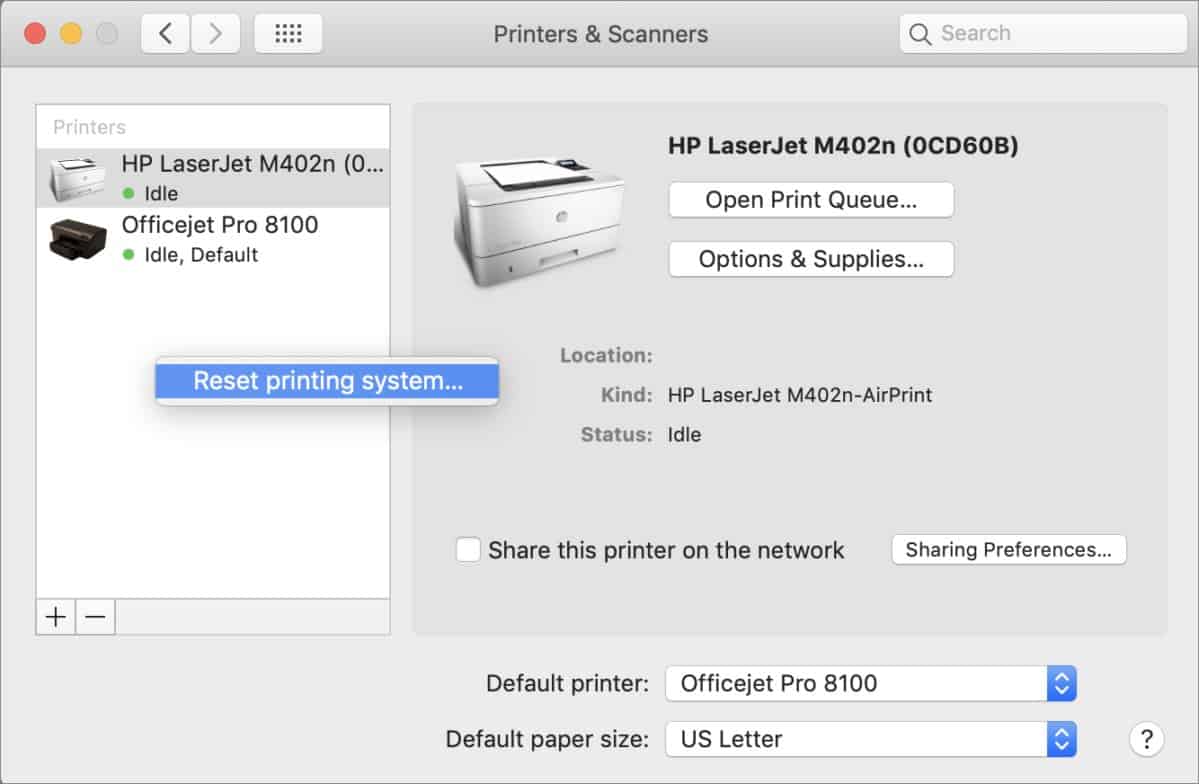
Method 2: Re-Add your Printer.
Step 1- Open System Preferences on your Mac PC with its icon in the Dock.
Step 2- Click on the ‘ Printers & Scanners ‘ option which you will find under the Hardware category.
Step 3- Now, select the printer which is offline and right-click on it. Then, select the ‘ Reset printing system ‘ option to remove that particular printer.
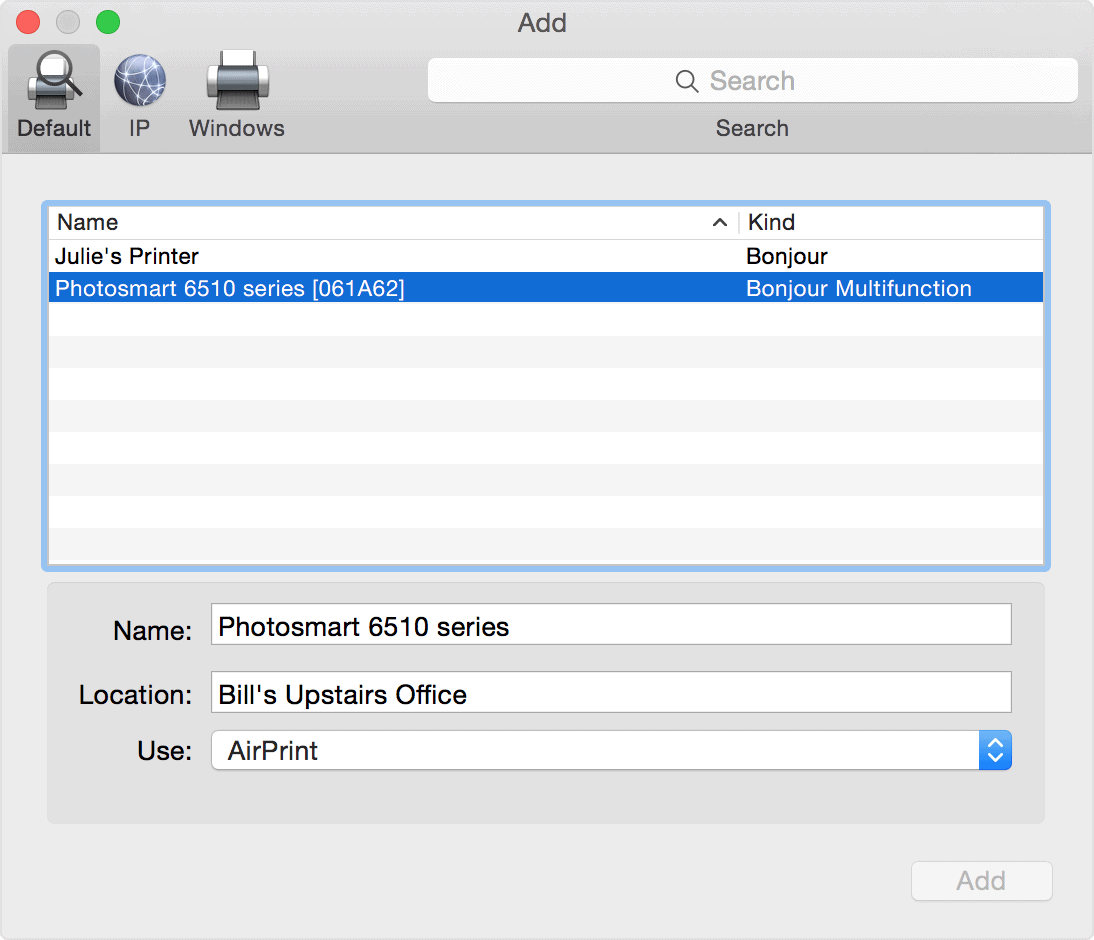
Step 4- To re-add your printer, click on the ‘ + ‘ button located at the bottom of the same window.
Method 3: Restart your MacBook or iMac.
If none of the above-listed methods help you in turning your printer online, try restarting your PC. Check if your printer is back online after restarting your PC.
The Verdict:
These were some of the most useful ways which you can use to make your Printer online on your Macbook or iMac MacOS. The steps involved in these methods are easy to execute. We are confident that one of the above-listed methods will help your turn your Printer online. Start executing the methods from the top and work your way down the list till the error is fixed on your PC.
