- Wireless printers can be added to your Windows 11 PC for wireless printing convenience.
- Follow steps to manually add a wireless printer in Windows 11: Open Settings, go to Bluetooth & devices, click on Printers & scanners, and Add device.
- If the printer isn’t listed, add it manually by selecting Add a Bluetooth, wireless, or network discoverable printer and following the prompts to successfully add the printer.
Today’s printers have both wired and wireless connections that you can use to connect them to your computer. After connecting the wireless printer to your wireless network, you can print wirelessly from anywhere in your house. You may want to add your wireless printer to your PC if you have a new printer or if you have recently installed Windows 11 on your system. If you wish to install a wireless printer to Windows 11 without know-how, this article will guide you through the process.
How To Add a Printer to Windows 11
This article will go through how to set up a wireless printer in Windows 11.
Adding Wireless Printer In Windows 11
Most probably, Windows 11 should find the wireless printer once your PC and the printer are connected to the same Wi-Fi network. However, if the wireless printer is not added automatically in Windows, then you can follow the steps given below to add the wireless printer in Windows PC manually-
- Open the Settings app on your PC by pressing the Windows + I key combo. Then, you can either search for the Settings app in the Start Menu or hit Enter to open the Settings app.

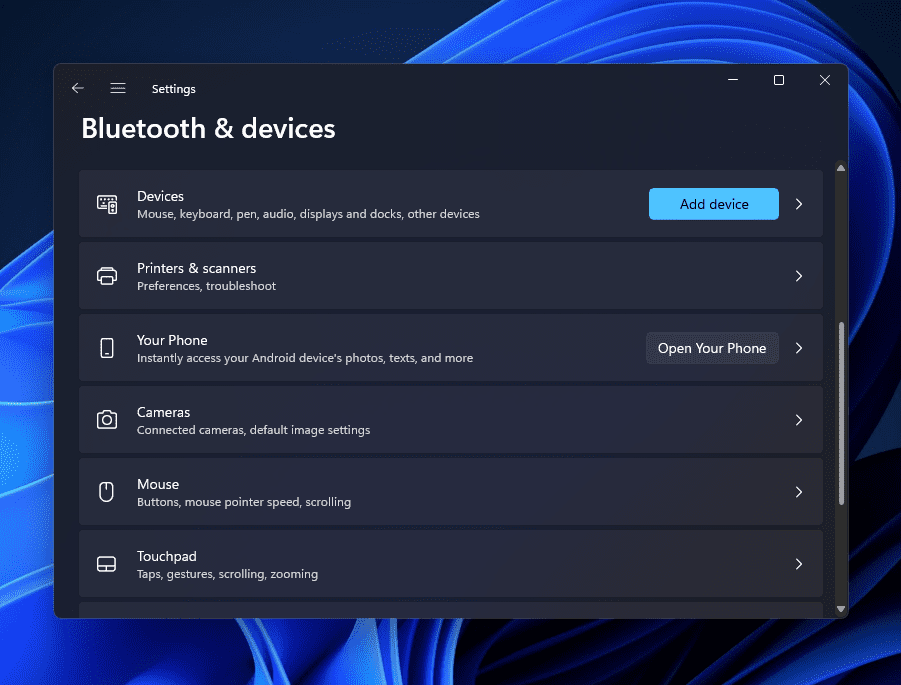
- Head to the Bluetooth & devices section from the left sidebar of the Settings app, and then on the right side, click on Printers & scanners.
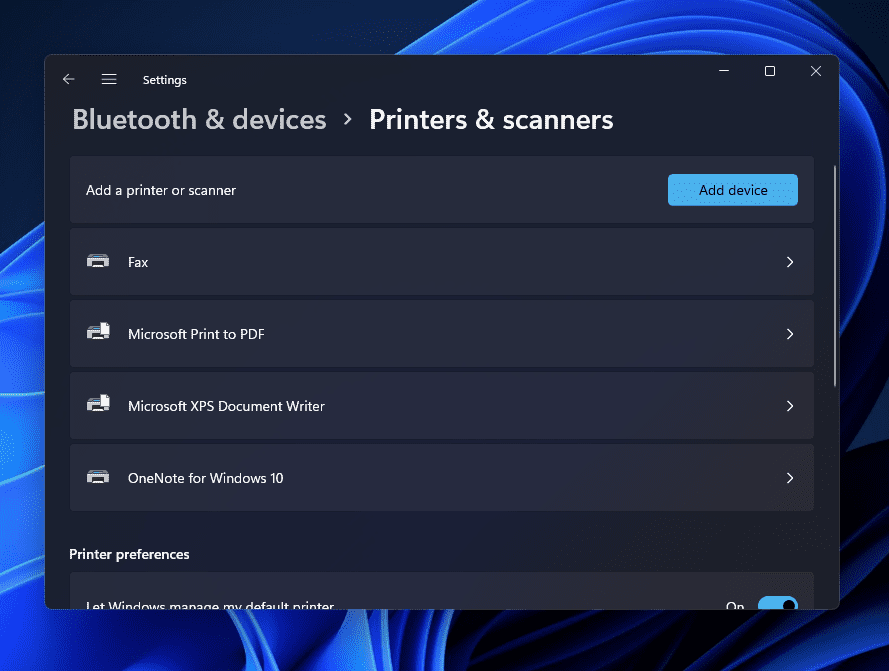
- Click on the Add device button next to the Add a printer or scanner option.
- You should now find the printer listed here. If you get a message saying ‘The printer that I want isn’t listed , then click on Add Manually button.
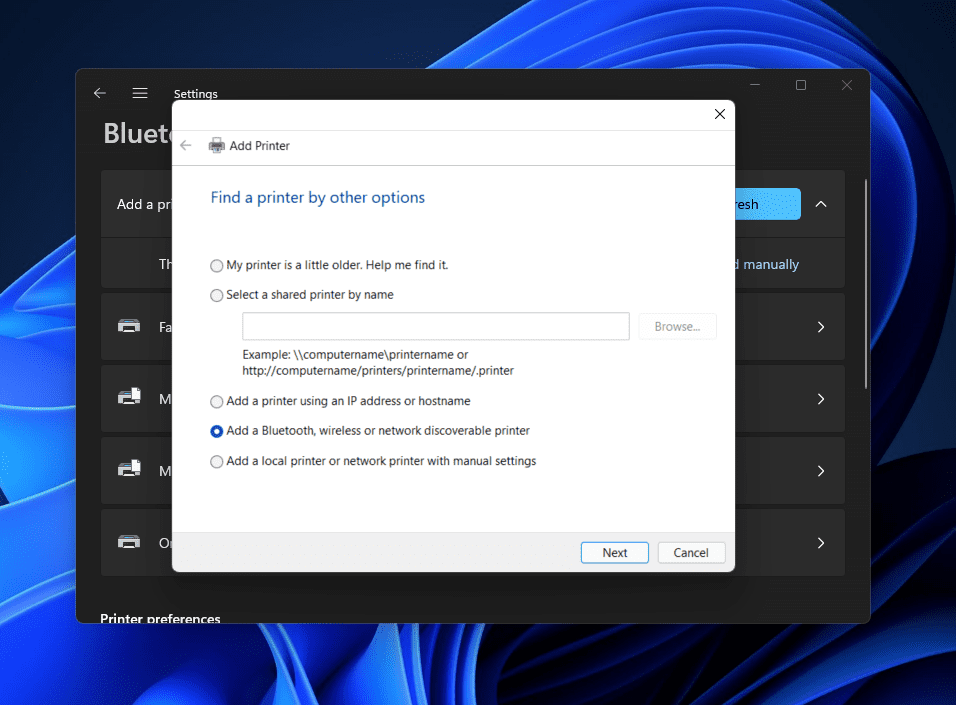
- Select the Add a Bluetooth, wireless, or network discoverable printer and then click on the Next button on the next window.
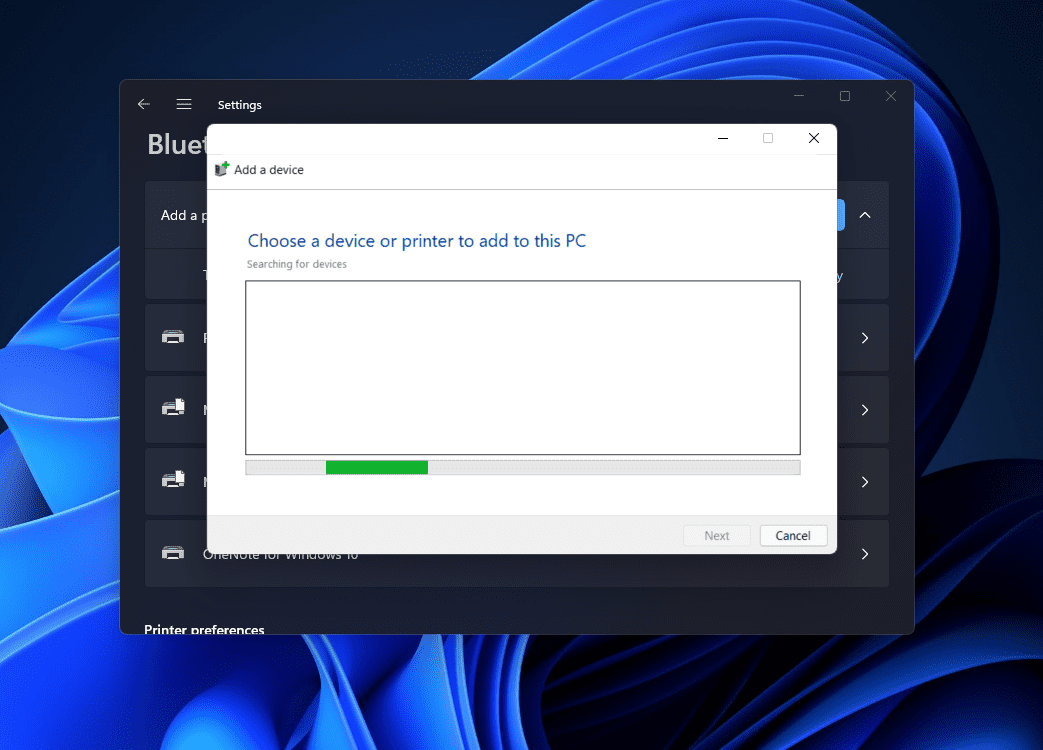
- Next, you will see your printer listed. Select the printer you want to add to your PC from the list and click on Next.
- If Windows 11 locates the printer through the IP address but cannot get the driver’s location, then click on Have Disk button to install the printer software manually.
- Once done, the printer will be added to Windows 11 successfully.
Suppose no printer is found even after trying all the above steps. In that case, you should probably try downloading the printer software/driver from the internet.
RELATED GUIDES:
- How To Delete Printer Driver In Windows 11
- How To Install Windows 11 Printer Drivers Easily
- Top 10 Best Audio Voice Recorder for Windows 11 PC
- How To Fix Windows 11 Printer Spooler Error
- How to Get Printer Online Issue on Mac
Bottom Line
If you have a wireless printer that you want to add to Windows 11, this article might prove helpful. In this article, we have discussed the complete step-by-step process to add a wireless printer to your PC. You can follow the steps given above to add a wireless printer to Windows PC.
- Deleting printer drivers in Windows 11 can fix printer-related issues
- Use the Settings app to delete printer drivers easily:
- Open Settings using Windows + I
When there’s some problem with the printer, and you cannot use it on your PC, the best way to fix the issue would be to remove the printer driver. Well, many people prefer removing the printer and then installing it again, and to some extent, that can do the job if the issue is not due to the hardware issues. If you have been facing issues with the printer and want to delete the printer driver, fortunately, you do have the option to do so.
Delete Printer Driver In Windows 11
In this article, we will be discussing how you can delete a printer driver in Windows 11 .
Deleting Printer Driver Through The Settings App
The very first way to delete printer drivers is through the Settings app. To delete the printer driver through the Settings app, follow the steps given below-
- Press the Windows + I key to open the Settings app on your PC.
- Next, click on the Bluetooth & devices on the left sidebar of the Settings app.

- Now on the right side, click on the Printers & Scanners. You will see a list of all the printers you have added to your PC.

- Click on the printer for which you want to delete the driver. Now, click on the Remove button next to the printer to remove it along with the drivers associated with it.

- If you are asked to confirm deleting the printer driver, click on Yes. Once done, restart your PC for the changes to take effect.
Deleting Printer Driver Using Print Management
Another way to do so is by using print management. Follow the steps given below to delete the printer driver using the print management-
- Press the Windows key on your keyboard to open the Start Menu. In the Start Menu, search for Print Management and then click on it to open the app window.
- Expand the Custom Filters section on the left sidebar of the Print Management app window.
- You will now see a list of all the printer drivers on your PC.
- Select the drive that you want to remove from your PC. Right-click on it, and then click on the Remove Driver Packager option.
- You will be asked to confirm removing the driver. When asked to confirm your choice, click on Yes.
- This will delete the printer driver from your PC.
Deleting Printer Driver Using Command Prompt
You can also delete the printer driver using the Command Prompt. Given below are the steps to delete the printer driver using the Command Prompt-
- You will have to launch the Command Prompt as administrator. To do so, open the Start Menu and search for CMD. Now, right-click on the Command Prompt and click on Run as administrator.

- In the Command Prompt, type the command wmic printer get name and hit Enter to execute.
- You will now see the list of all the printers on your PC.
- Next, type the command printui.exe /dl /n “YOUR-PRINTER-NAME” and execute it. You will have to ensure you replace YOUR-PRINTER-NAME with the printer’s name that is displayed on the list.

- The printer will now get removed. Ensure you restart your PC after doing so.
Deleting Printer Driver Using PowerShell
The last way to delete the printer driver is by using PowerShell. You can do so by following the steps given below-
- Press the Windows + X key combo, and then from the menu, select Windows Terminal (Admin).
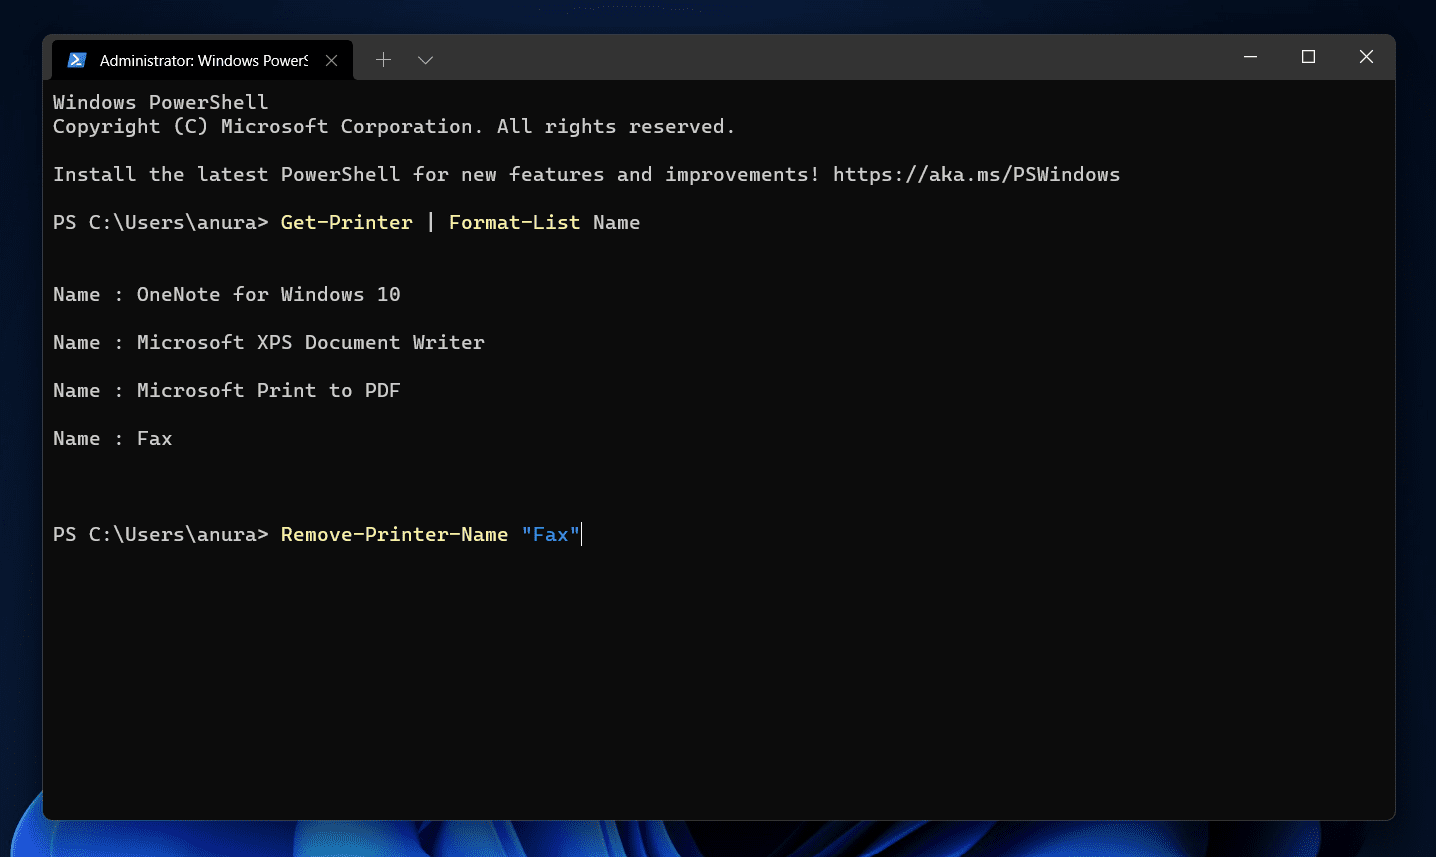
- Now enter the command Get-Printer | Format-List Name in the Windows PowerShell and hit Enter to execute the command.
- Next, type the command Remove-Printer-Name “Your-Printer-Name” and hit Enter. Ensure you replace Your-Printer-Name with the name of the printer you see here.
- This will remove the device along with its driver.
RELATED GUIDES:
- How to Create PDF File in Windows 11
- How to Install Windows 11 Printer Drivers Easily
- How to Fix Windows 11 Printer Spooler Error
- Top 5 Ways to Fix Windows 11 23H2 Copilot Not Showing
Final Words
This is how you can delete the printer driver on Windows 11. We have discussed the four ways to delete printer drivers in Windows 11 easily. Following the above steps, you will remove the printer driver in Windows 11.
- Printer drivers are essential for keeping your printer functional and bug-free.
- Update printer drivers through Windows update by accessing Settings, checking for updates, and installing the driver.
- Other methods include downloading drivers from the official website, using a disk to install drivers, or utilizing third-party driver updater software like Driver Booster.
If you are an office person, student or someone, whose main part of the job is printing, then you will need to have updated your printers drivers. Printer drivers are essential to keep your printer functional and updated with all the latest features. Updating the printer drivers ensures that your printer functions and remains bug-free. There are various ways to update printer drivers, you can do it manually as well as with the help of a third-party driver updater.
How To Install Windows 11 Printer Drivers
In this article, we will be discussing how you can install Windows 11 printer drivers.
Updating Printer Drivers Through Windows Update
The very first way to update printer drivers is through the Windows update. Windows update not only brings the updates for Windows but it also brings all the drivers updates for the hardware installed on your PC. To install Windows 11 printer drivers through Windows update, follow the steps given below-
- Head to the Settings app on your PC. To do so, search for Settings in the Start Menu or press the Windows + I key combo. This is the shortcut key to open the Settings app.
- Now in the Settings, click on the Windows update on the left sidebar.
- On the right side of the Settings, click on Check for updates. You will see all the updates for your PC listed here. You will also see an Option updates section here. Click on it, and this is where you will see the driver update.

- Look for your printer drivers here. Download and install your printer drivers.
- After done, close the Settings app and then restart your PC to make the changes.
Download The Drivers From The Official Website
Another way to do this is by downloading the drivers from the official website of your printer’s manufacturer and then installing it. To do so, follow the steps given below-
- Firstly, visit the official website of your printer. For instance, if you are using the printer from Canon, Epson, HP, or any other website, then head to their official website for the printer.
- Now search for your model of printer, and open it. If you don’t know what is the model of your printer, then you can check for it on the printer box. Generally, the model is mentioned on the body of the printer, so you can check that as well.
- Here, you will see the download section, click on it. You will find the drivers for your printer here.
- Download the driver for your printer.
- Now head to the location where you have saved the file, and run the setup by double-clicking on the file.
- Follow the on-screen instructions to install the drivers for your printer.
Use The Disk To Install Drivers
Whatever printer you are using, will have a disk with all the essential drivers required. You should find it inside the box. To follow this step, you must ensure that your PC has a CD driver, else you won’t be able to install drivers using this method.
- Insert the disk into the disk drive of your PC.
- Now open the file explorer on your PC by pressing the Windows + E key combo. You can either search for File Explorer in the Start Menu and open it.
- Double-click on the Disk Drive icon on the File Explorer to run the setup.
- Follow the on-screen instructions to run the setup, and install the printer drivers on Windows 11.
Using Third-Party Driver Updater
Another way to do this is by using third-party driver updater software. There are various third-party driver updater software like Driver Booster or Driver Pack Solution. You can use either of this software to update or install Windows 11 printer drivers.
Download either the Driver Booster or the Driver Pack Solution from their official website. Download and install any of these apps on your PC. When you run the app, you will see the option to scan your PC for outdated or missing drivers. Click on this button. You will have to connect your PC to a stable internet connection.

After the software scans your PC for all the drivers required to be installed or updated, you will see a list of drivers. Select the printer driver, download it and install it. You will be asked to restart your PC. Restart to make the changes, and you will have successfully installed Windows 11 printer drivers.
RELATED GUIDES:
- How to Get Printer Online Issue on Mac
- How To Fix Windows 11 Printer Spooler Error
- How to Get Printer Online on Windows 10 (Offline to Online)
- How to Fix HP Printer Not Showing Up on Network
- How to Fix Error 740 While Adding Printer on Windows 10/11
This is how you can install Windows 11 printer drivers. We hope this article helps you with installing Windows 11 printer drivers.
- Printer spooler error in Windows 11 is a common issue caused by an overloaded spooler with printing tasks.
- Solutions to fix the error include restarting your PC, updating Windows, running the printer troubleshooter, clearing the printer queue, using a different printing app, and reinstalling the printer.
- Additional fixes involve fixing print spooler services, clearing the printer queue, and using the command prompt to stop and restart the spooler.
Many times when wanting to take a printout from the printer, you may get a certain error that may cancel the print. This can be frustrating when you have to take a printout, but due to certain errors, you are not able to do so. Printer spooler error is a common error in Windows 11 that you may encounter. The printer spooler organizes the printing tasks. Moreover, it queues them for being sent to other printers and printing services. When the printer spooler is overloaded with tasks then you may face this error.
Fix Printer Spooler Errors in Windows 11
If you are facing Printer Spooler Errors in Windows 11, then there is nothing to worry about it. In this article, we will be discussing how you can fix Printer Spooler Errors in Windows 11.

Fix 1: Restart Your PC
Many times this error may be associated with random and temporary bugs on your system. Such errors can easily be solved by restarting your PC. You should try restarting your PC, and then check if you still get the error or not.
Fix 2: Update Your Windows
You should try updating your Windows 11. If this is a bug in Windows 11, then it will get fixed in the latest update of Windows 11. You should try updating your PC, and then check if you still get the Printer spooler errors in Windows 11 download .
Fix 3: Run The Printer Troubleshooter
The next thing that you can do is running the printer troubleshooter. The printer troubleshooter will identify any problems with your printer and will fix them. To run the printer troubleshooter, follow the steps given below-
- Open the Settings on your PC by pressing the Windows + I key combo.
- By default, you will be headed to the System section in Settings. If you are not on the System section, then you can click on System in the left sidebar in the settings.

- Here, click on troubleshoot and then click on other troubleshooters. Now click on the run option next to the printer. This will run the printer troubleshooter.
- Follow the on-screen instructions to scan your printer for any problem and fix it.
Fix 4: Clear The Printer Queue
As we have discussed, you may encounter this issue when the Printer Spooler is overloaded with various printing jobs. To fix this issue, you must try clearing the printer queue. After you clear the printer queue, the Printer Spooler will no longer be overloaded, and you will not face the issue.
Fix 5: Use Another App And Remove All Other Printers
If you still face this issue, then you should try using any other printing app. You may face this error due to some bug in the app you are using. Try using any other app for printing and the issue should be fixed.
You may also face this issue if multiple printers are connected to your PC. Multiple printers may conflict with the PC and may cause Printer Spooler errors in Windows 11. You may try removing all the other printers that may be causing the error, and check if the error persists or not. If you still get the Printer Spooler error, then you should move to the next step.
Fix 6: Reinstall The Printer
You should try removing the printer that you are using for printing. Remove the printers along with the drivers, and the software. Once done, reinstall the printer, and try printing again. You should now not face the issue.
Fix 7: Fix Print Spooler Services
Another thing that you can try doing is fixing the Print Spooler Services. To do so, follow the steps given below-
- Press the Windows + R key combo on your keyboard. In the run dialog box, type services.msc and hit Enter.
- This will open Services windows on your PC.
- Here search for Print Spooler services. Right-click on it, and then click on the Properties option.

- Head to the General tab in the properties, and then click on Stop.
- After doing so, press the Windows + R key combo, and type C:\Windows\System32\spool\printers, and hit Enter.
- Now select everything in the printers folder, and delete them.

- Now head back to the Print Spooler Properties window in the Services.
- Now click on the start button to start the service again. Once done, click on OK.
Now try printing from the printer, and you should now not encounter the Printer Spooler errors in Windows 11.
Fix 8: Fixing Print Spooler Using Command Prompt
If the above methods didn’t help you fix the issue that you were facing, then you should try using the Command prompt to fix it. Follow the steps given below to fix the issue-
- In the start menu, search for CMD . Right-click on the command prompt and then click on run as administrator.

- Now in the command prompt, type the following commands, and execute them- net stop spooler del /Q /F /S “%systemroot%\System32\Spool\Printers*.*” net start spooler
Once done, you should now no longer face the issue. This method is the same as the previous method. Instead of the Services app, you will be using the command prompt here to fix the issue.
RELATED GUIDES:
- Fix Xbox One That Won’t Connect To Live in Windows 11
- How to Fix Critical Process Died Error in Windows 11
- How To Fix Stuck Airplane Mode In Windows 11
Final Words
If you are facing Printer Spooler errors in Windows 11, then you can follow the steps given in this article. Following the above steps mentioned in this article, you will be able to troubleshoot the error.
- Printer Offline error is a common issue on Mac and Windows, preventing document printing.
- Method 1 involves accessing System Preferences, selecting the offline printer, and clicking ‘Resume Printer’.
- Method 2 requires removing and re-adding the offline printer in System Preferences, while Method 3 suggests restarting the MacBook or iMac if previous methods fail.
When using a printer, you will come across several errors. One of the most frequently occurring errors while printing documents remotely is the Printer Offline error which is on Windows as well as on Mac. In this error, your printer will not print any document and a ‘Printer offline‘ message will be displayed on your screen. Recently we shared how to fix printer offline issues on Windows 10 . And in this tutorial, we have shared a simple guide by which you can fix printer online issues on your Macbook or iMac.
How to Get Printer Online Error on Mac
Method 1: Resume Printer.
Step 1- Open System Preferences on your Mac PC with the help of its icon in the Dock.
Step 2- Click on the ‘ Printers & Scanners ‘ option which you will find under the Hardware category.
Step 3- Now, select the printer which is offline and right-click on it. Then, select the ‘ Open Print Queue ‘ option to open the queue window of your Printer.
Step 4- At the top of the queue window, you will find a ‘ Resume Printer ‘ option. Click on it to turn your Printer online.
If your printer does not turn online, go to the next method listed below.
Method 2: Re-Add your Printer.
Step 1- Open System Preferences on your Mac PC with its icon in the Dock.
Step 2- Click on the ‘ Printers & Scanners ‘ option which you will find under the Hardware category.
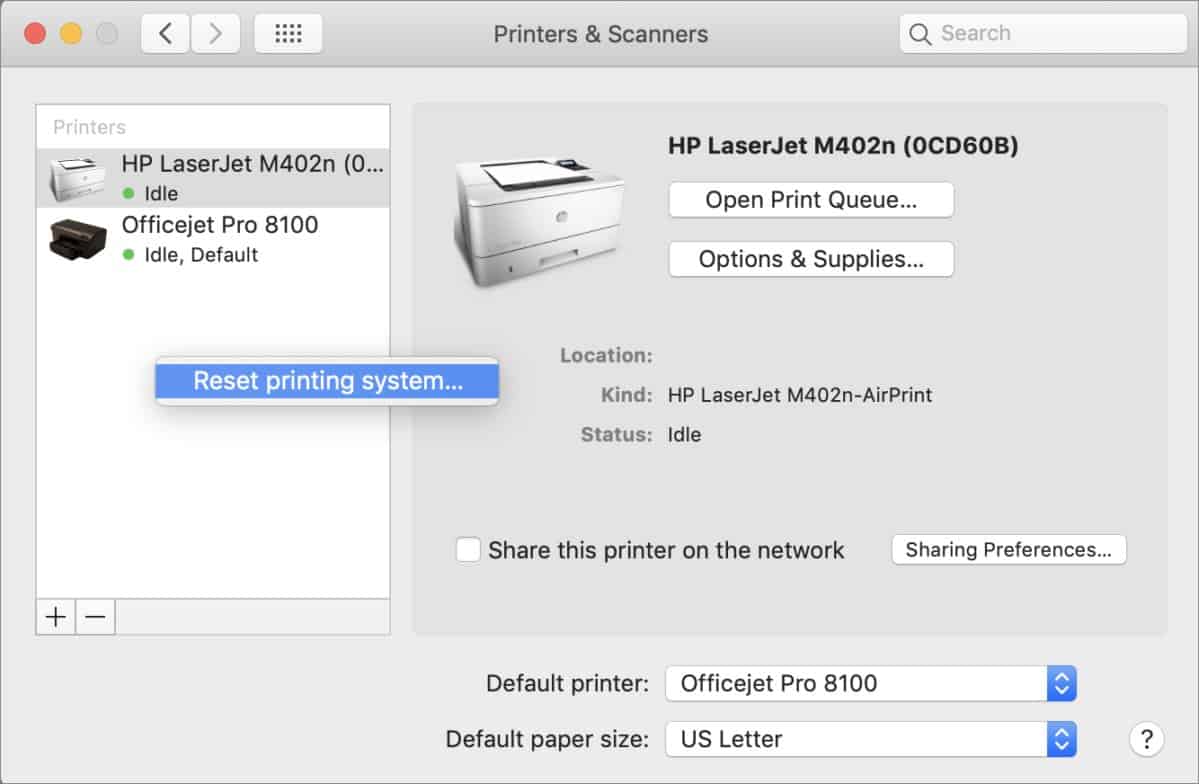
Step 3- Now, select the printer which is offline and right-click on it. Then, select the ‘ Reset printing system ‘ option to remove that particular printer.
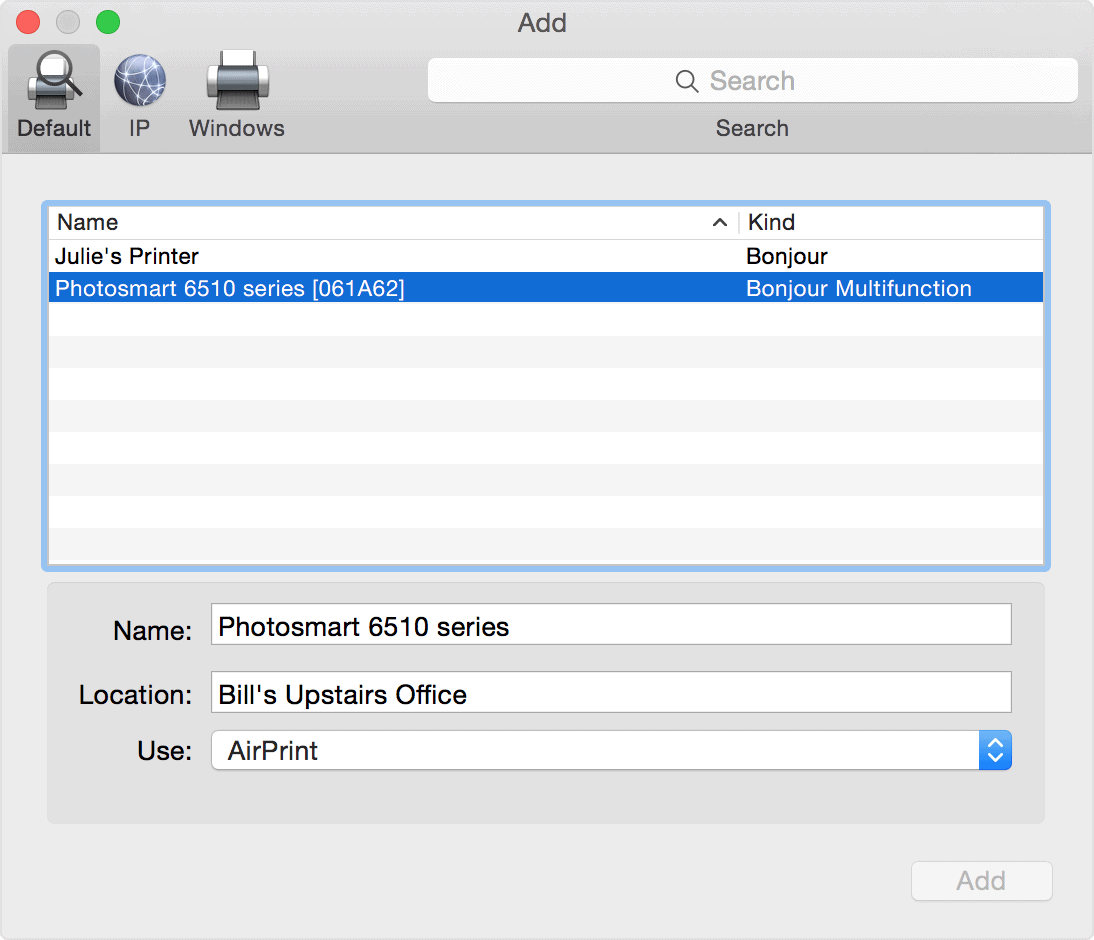
Step 4- To re-add your printer, click on the ‘ + ‘ button located at the bottom of the same window.
Method 3: Restart your MacBook or iMac.
If none of the above-listed methods help you in turning your printer online, try restarting your PC. Check if your printer is back online after restarting your PC.
The Verdict:
These were some of the most useful ways which you can use to make your Printer online on your Macbook or iMac MacOS. The steps involved in these methods are easy to execute. We are confident that one of the above-listed methods will help your turn your Printer online. Start executing the methods from the top and work your way down the list till the error is fixed on your PC.
- Wireless printers can be added to your Windows 11 PC for wireless printing convenience.
- Follow steps to manually add a wireless printer in Windows 11: Open Settings, go to Bluetooth & devices, click on Printers & scanners, and Add device.
- If the printer isn’t listed, add it manually by selecting Add a Bluetooth, wireless, or network discoverable printer and following the prompts to successfully add the printer.
Today’s printers have both wired and wireless connections that you can use to connect them to your computer. After connecting the wireless printer to your wireless network, you can print wirelessly from anywhere in your house. You may want to add your wireless printer to your PC if you have a new printer or if you have recently installed Windows 11 on your system. If you wish to install a wireless printer to Windows 11 without know-how, this article will guide you through the process.
How To Add a Printer to Windows 11
This article will go through how to set up a wireless printer in Windows 11.
Adding Wireless Printer In Windows 11
Most probably, Windows 11 should find the wireless printer once your PC and the printer are connected to the same Wi-Fi network. However, if the wireless printer is not added automatically in Windows, then you can follow the steps given below to add the wireless printer in Windows PC manually-
- Open the Settings app on your PC by pressing the Windows + I key combo. Then, you can either search for the Settings app in the Start Menu or hit Enter to open the Settings app.
- Head to the Bluetooth & devices section from the left sidebar of the Settings app, and then on the right side, click on Printers & scanners.
- Click on the Add device button next to the Add a printer or scanner option.
- You should now find the printer listed here. If you get a message saying ‘The printer that I want isn’t listed , then click on Add Manually button.
- Select the Add a Bluetooth, wireless, or network discoverable printer and then click on the Next button on the next window.
- Next, you will see your printer listed. Select the printer you want to add to your PC from the list and click on Next.
- If Windows 11 locates the printer through the IP address but cannot get the driver’s location, then click on Have Disk button to install the printer software manually.
- Once done, the printer will be added to Windows 11 successfully.
Suppose no printer is found even after trying all the above steps. In that case, you should probably try downloading the printer software/driver from the internet.
RELATED GUIDES:
- How To Delete Printer Driver In Windows 11
- How To Install Windows 11 Printer Drivers Easily
- Top 10 Best Audio Voice Recorder for Windows 11 PC
- How To Fix Windows 11 Printer Spooler Error
- How to Get Printer Online Issue on Mac
Bottom Line
If you have a wireless printer that you want to add to Windows 11, this article might prove helpful. In this article, we have discussed the complete step-by-step process to add a wireless printer to your PC. You can follow the steps given above to add a wireless printer to Windows PC.
